

Oracle Smart View for Office allows you to retrieve data from Planning and Budgeting Cloud (PBCS) and analyze it in excel spreadsheets via Smart View ad hoc analysis. We previously covered the topic of how you can design a single ad hoc grid in Smart View - links to which can be found at the end of this blog post. In today's post, we'll walk you through how to create multiple ad hoc grids in Smart View worksheet.
In order to create more than one ad hoc grid in Smart View, you will first have to set up multi grid ad hoc analysis in PBCS.
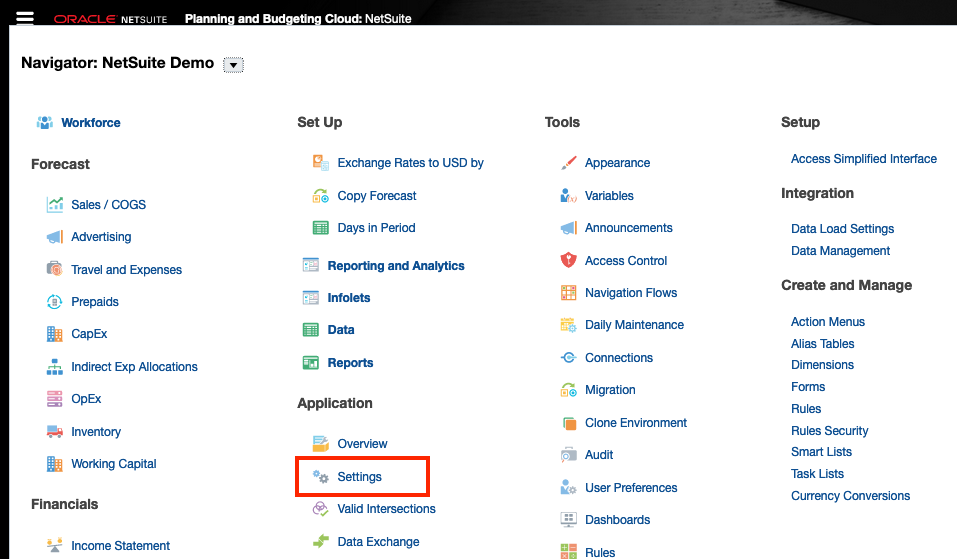
- Go to Settings under Application in the navigator menu.
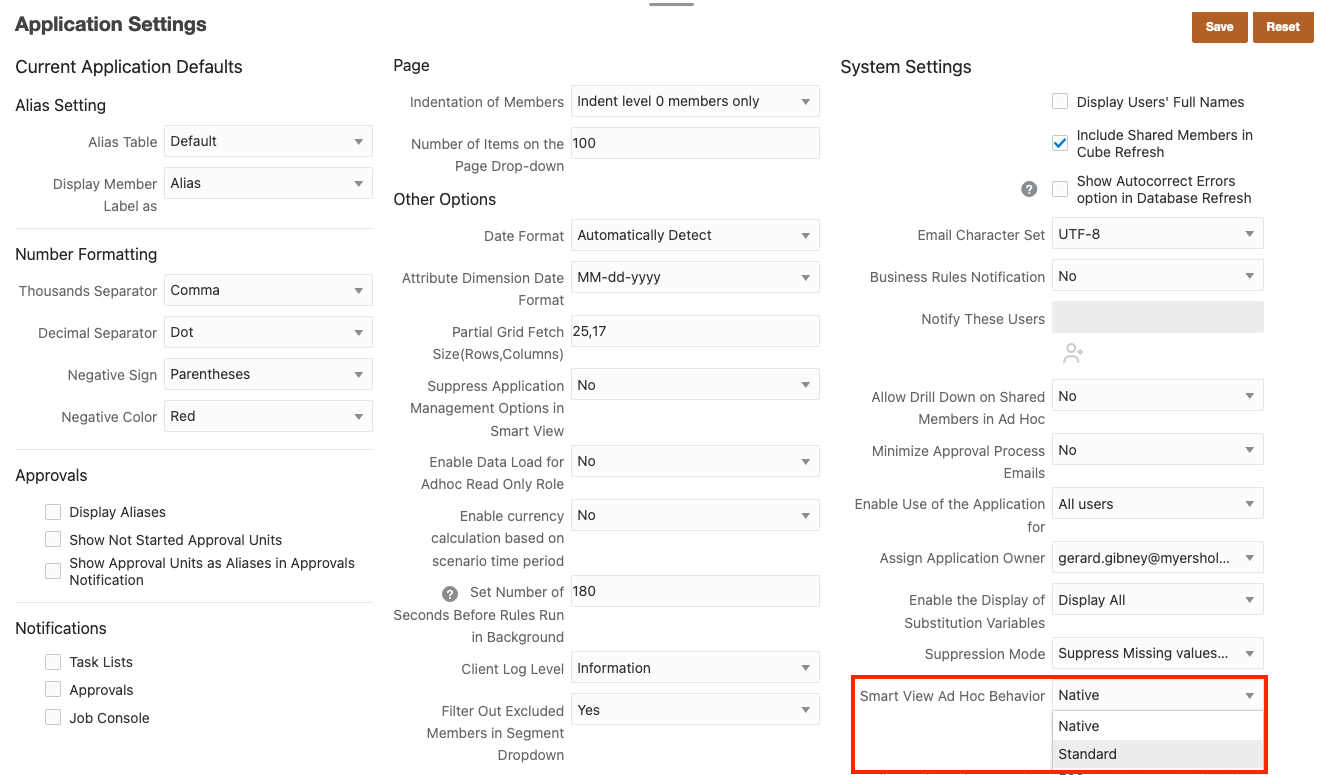
2. In Applications Settings page, navigate to "Smart View Ad Hoc Behavior". This is where you set up single versus multiple grid ad hoc analysis. Native is the default setting that only allows single grid. Select Standard setting to allow multiple grids on a single Smart View worksheet.
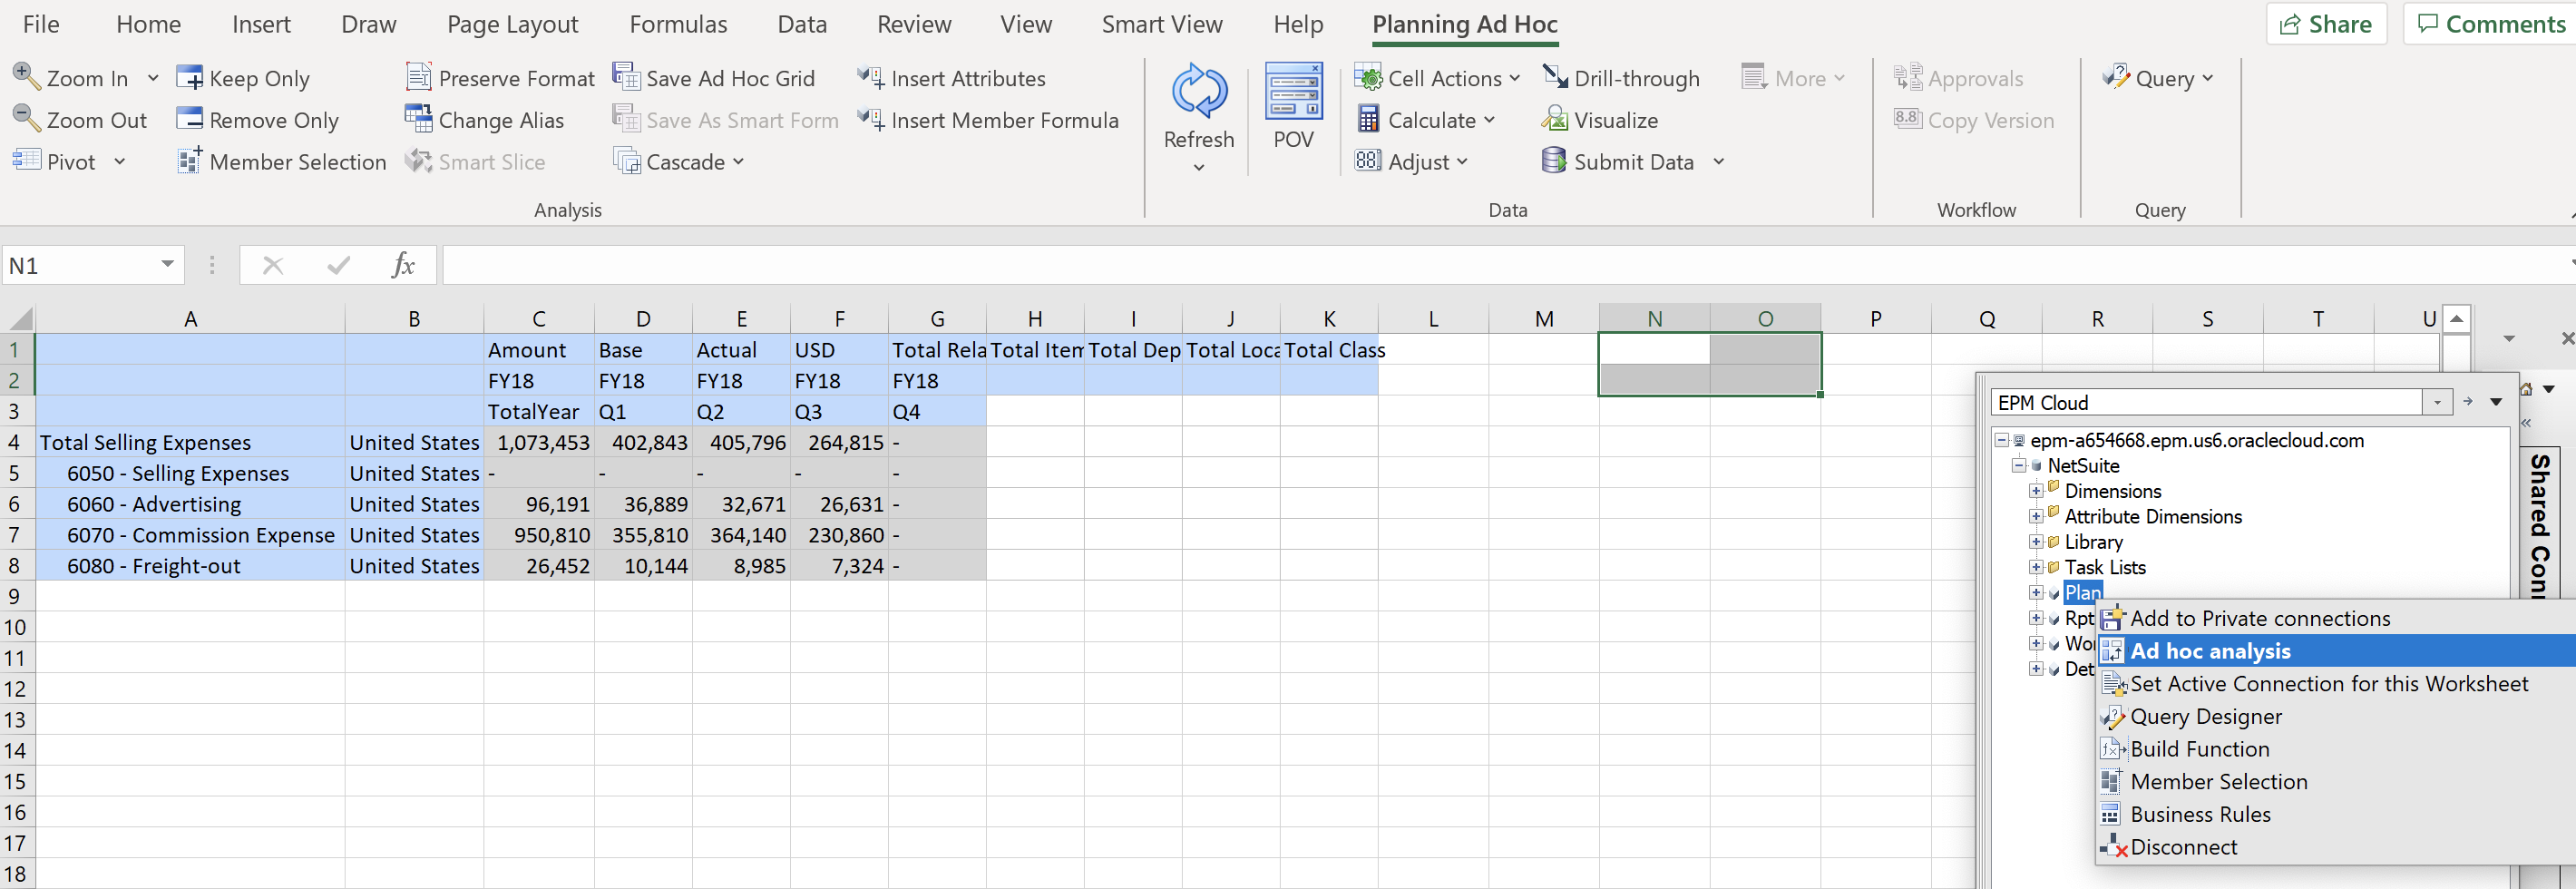
3. Open Smart View and set up the first ad hoc grid. To open a second grid, select an empty range of cells, consisting of at least two rows and two columns, outside of your first grid.
4. Right click on the data cube (e.g. Plan) and select Ad hoc analysis. You can set up the second grid from the same or different data cube. Multi-grid ad hoc analysis gives you the flexibility to retrieve data in these grids and work with each grid independently from one another.
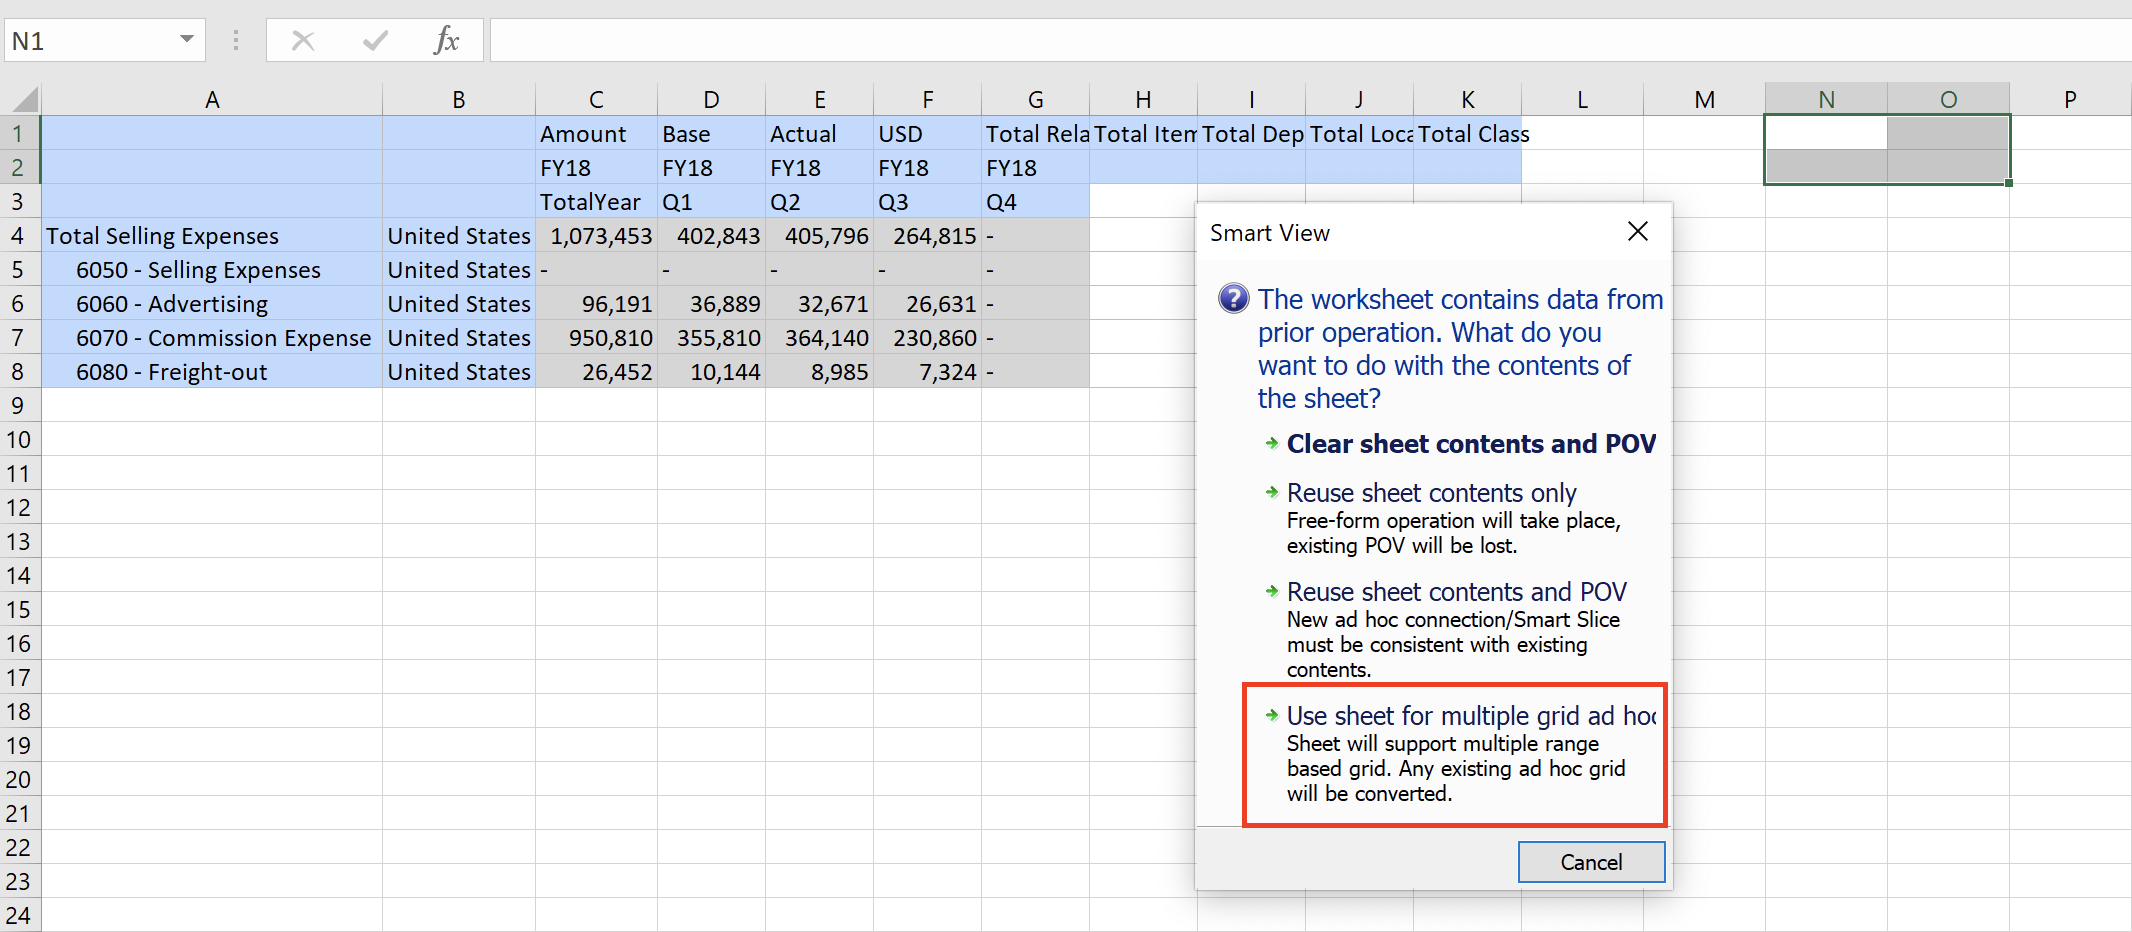
5. Smart View prompt will give you the option to have multiple ad hoc grids on the same worksheet. You only need to select this option once, on the first time you add the second grid.
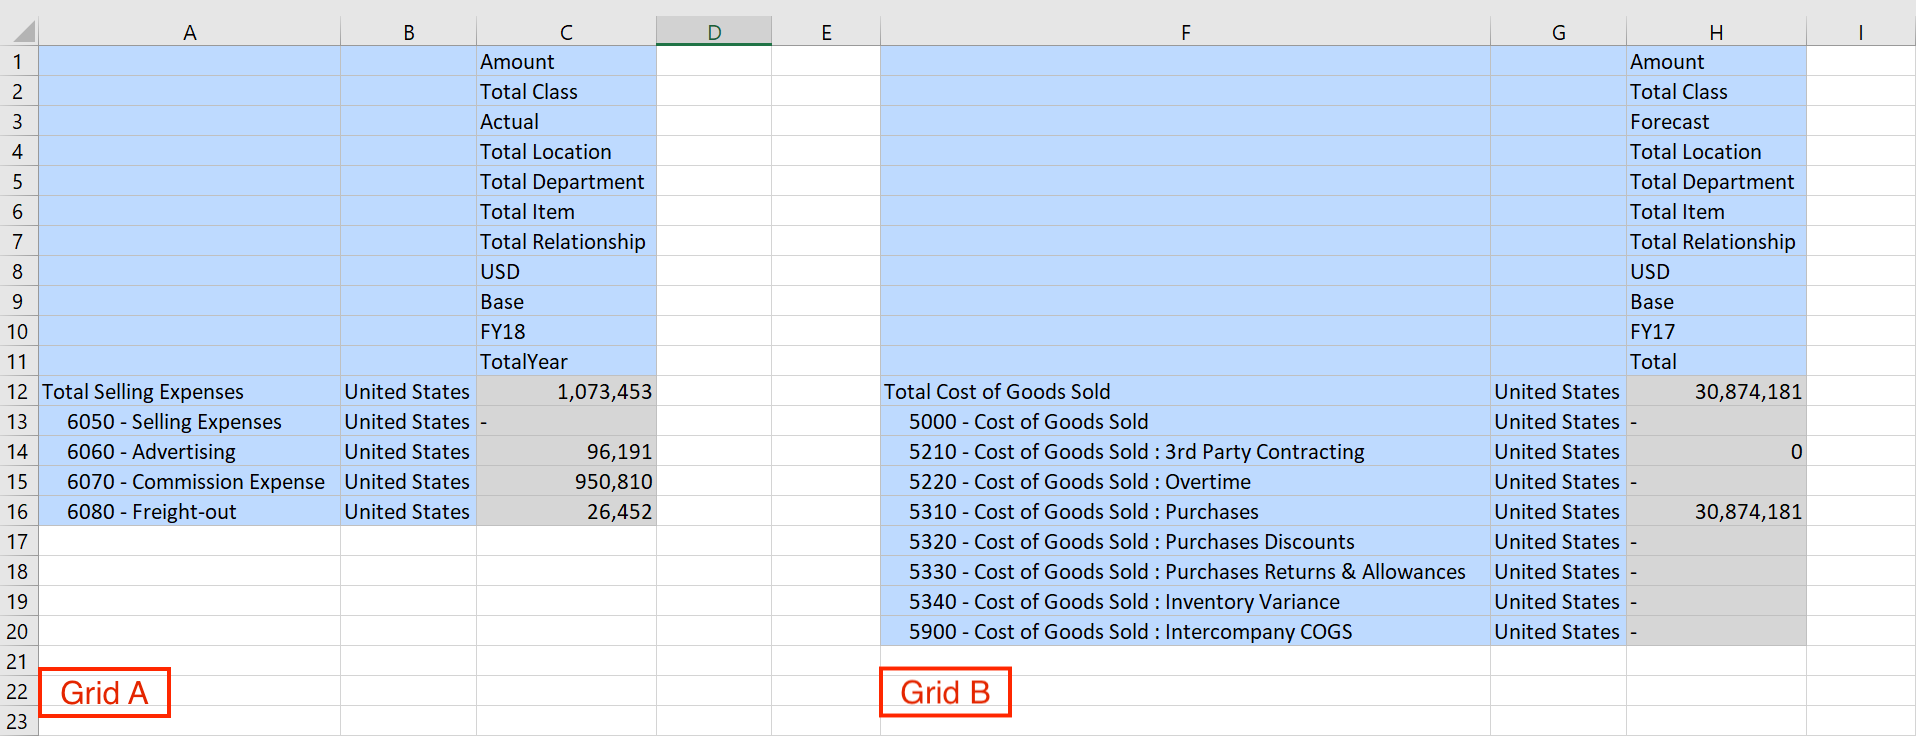
6. With multiple grids on one Smart View worksheet, you can modify the point of view (POV) for each grid individually, as highlighted in blue. In the example below, we create two different ad hoc grids on one worksheet. Grid A displays Total Selling Expenses actual data for FY18 while grid B displays Total Cost of Goods Solds forecast data for FY17.
7. As you drill down on members and select members in one grid, the other grids adjust to fit within the provided space.
These basic steps are how you can set up multi-grid ad hoc analysis in Smart View. You can perform ad hoc actions and commands just like when you set up single-grid ad hoc analysis such as Zoom In, Zoom Out, Keep Only, Remove Only, etc. To learn more about Smart View ad hoc analysis, refer to our other blog posts below:
Creating Basic Ad Hoc Analysis in Smart View
Advanced Ad Hoc Options in Smart View
Want to Learn More?
If you would like a free consultation please contact Gerard at Redhill Business Analytics via email or the contact form below.