

Ad hoc analysis is a built-in feature in Oracle Smart View for Office that allows you to retrieve data from Planning and Budgeting Cloud (PBCS) and analyze it in Excel spreadsheets. You can design an ad hoc report by selecting members, using functions, and performing operations. In this post, we'll show you how to create a basic ad hoc report in Smart View.
- Connect to Smart View in your Excel. If you don't know how to do so, check out our other blog post on How to Configure a Shared Connection in Smart View.
- To start an ad hoc report, from the Smart View panel, expand the URL, right click the reporting cube Rpt and select Connect.

3. Right click Rpt again and select Ad hoc analysis.

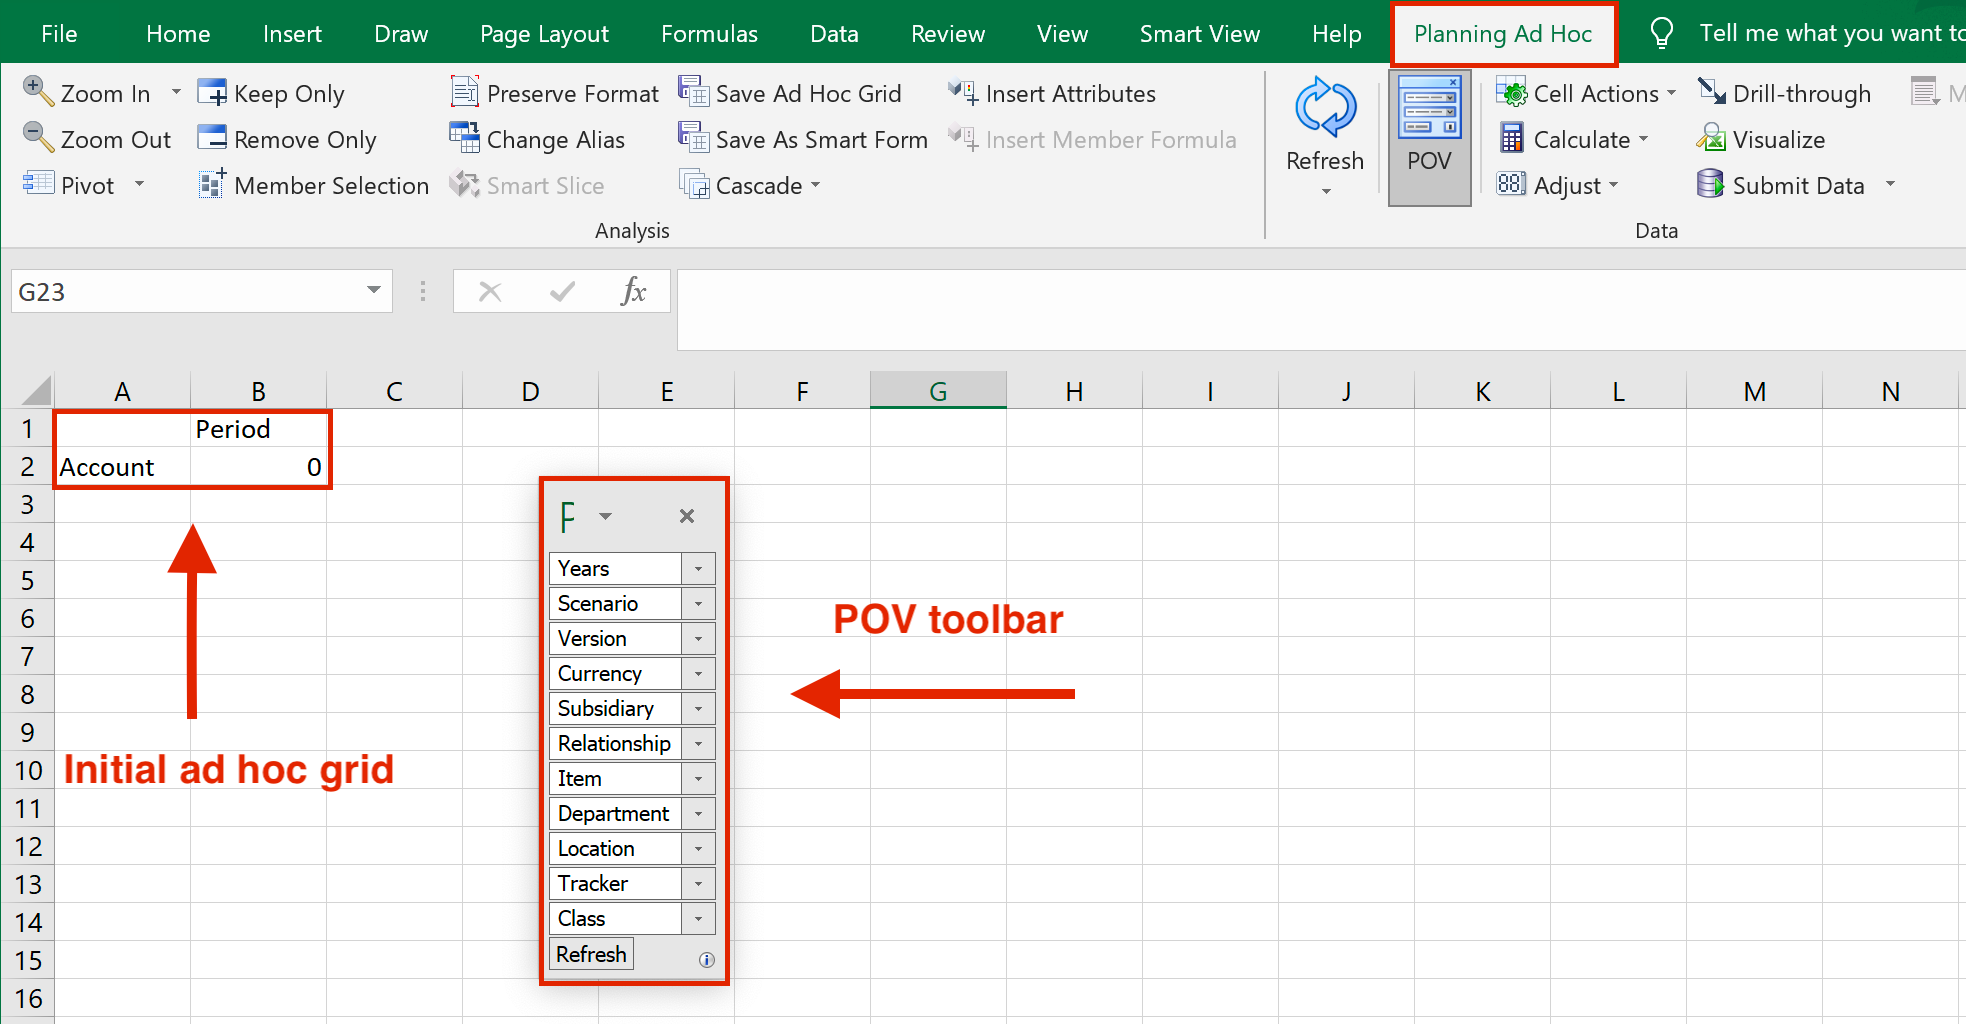
The Planning Ad Hoc ribbon will appear, giving you access to various ad hoc analysis tasks, a few of which will be covered later in this blog post. Initially, you will see the dimensions arranged in rows and columns to form an initial ad hoc grid. In this example, the initial grid is formed with Account dimension in the row and Period dimension in the column.
Select the POV button in Planning Ad Hoc ribbon to display all other dimensions in the POV toolbar. You can modify the initial ad hoc grid by dragging the dimensions from the POV toolbar to your worksheet.
4. To select member for each dimension, click the dimension name and then click Member Selection button in the Planning Ad Hoc ribbon.
The Member Selection window will pop up. The left column shows the dimension hierarchy from which you can choose your member, while the right column shows your selected member. In this example, we select Total R&D in the Class dimension. Use the right or left arrow to add or remove member from your selection. Click OK.
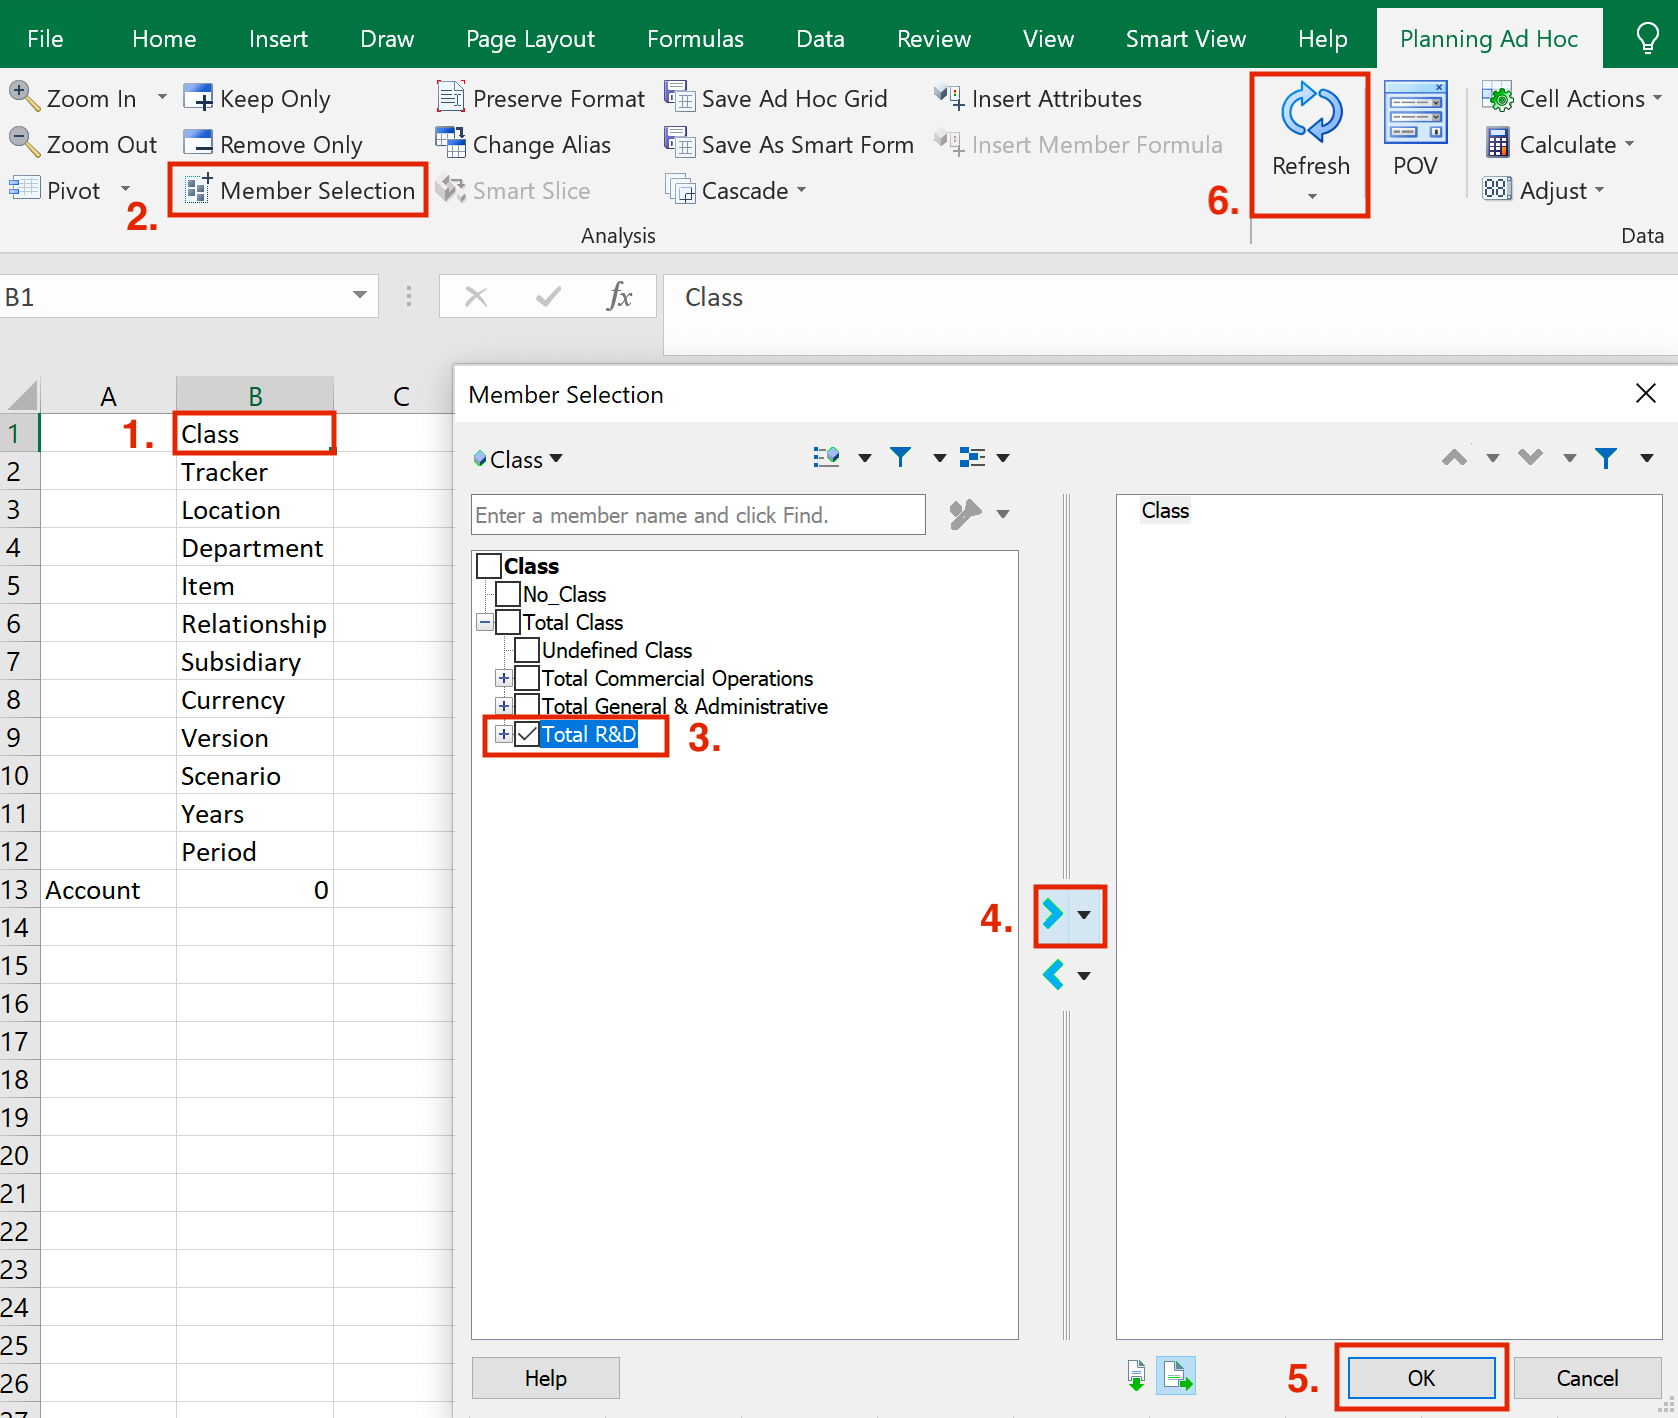
Note: If you know the name of the member you want from the dimension, you can find it in the search bar (in the Member Selection window) or type it directly in the grid. After selecting or typing member names, remember to refresh your grid to apply your changes.
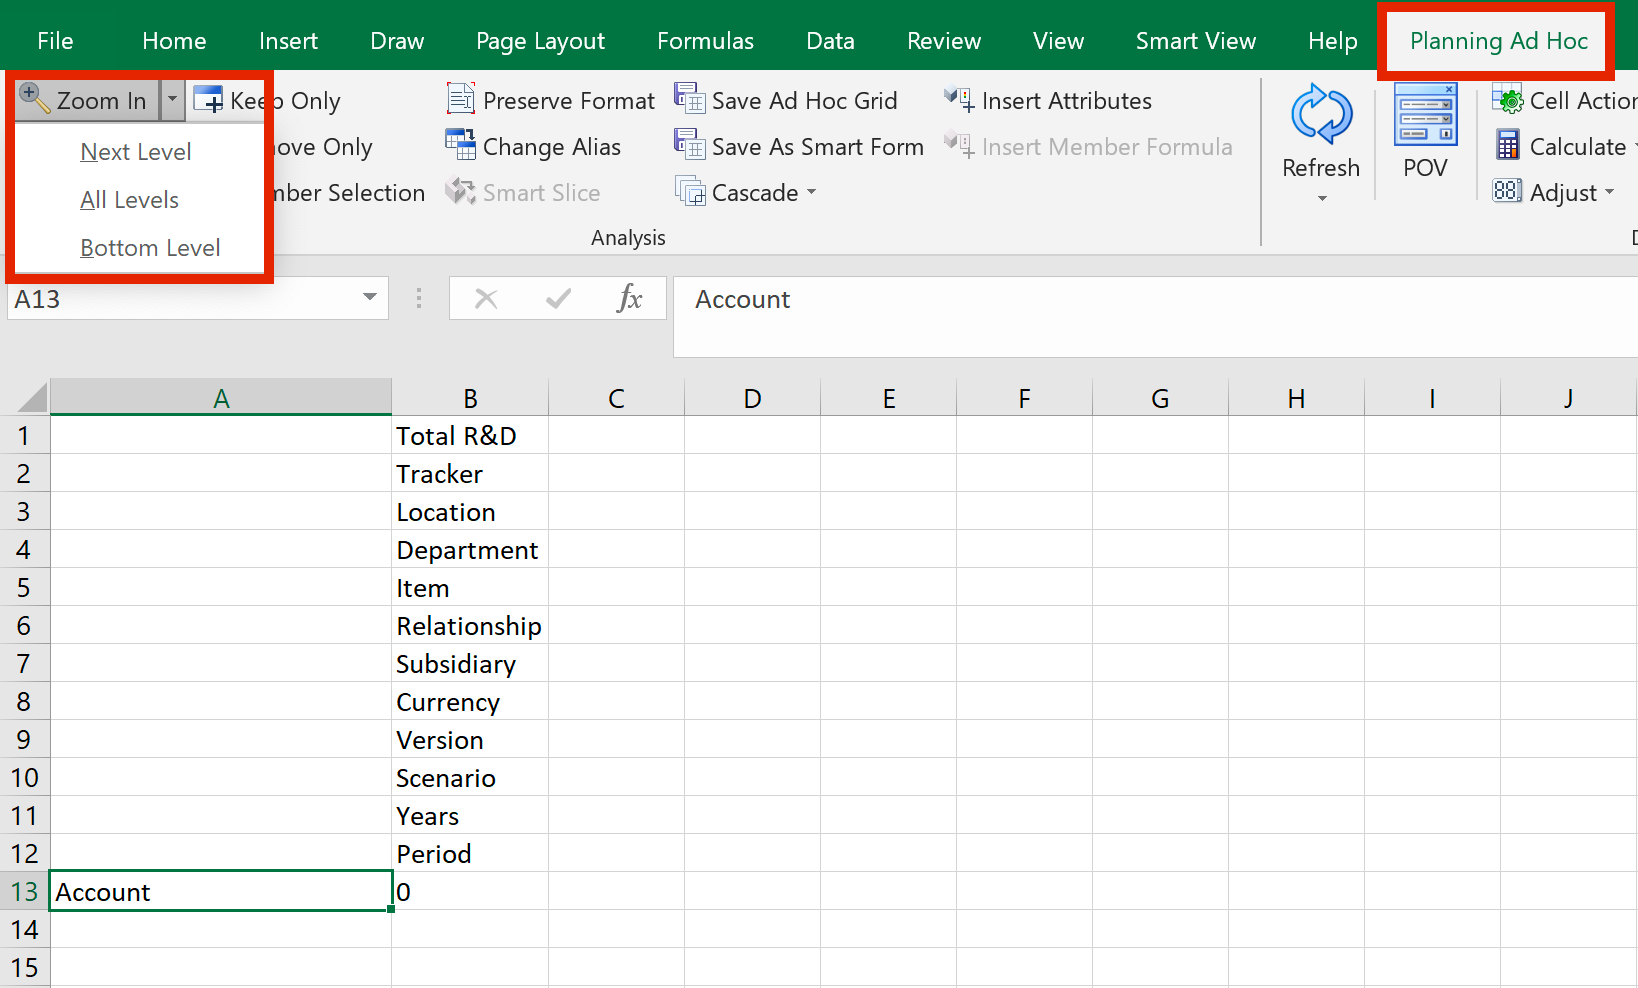
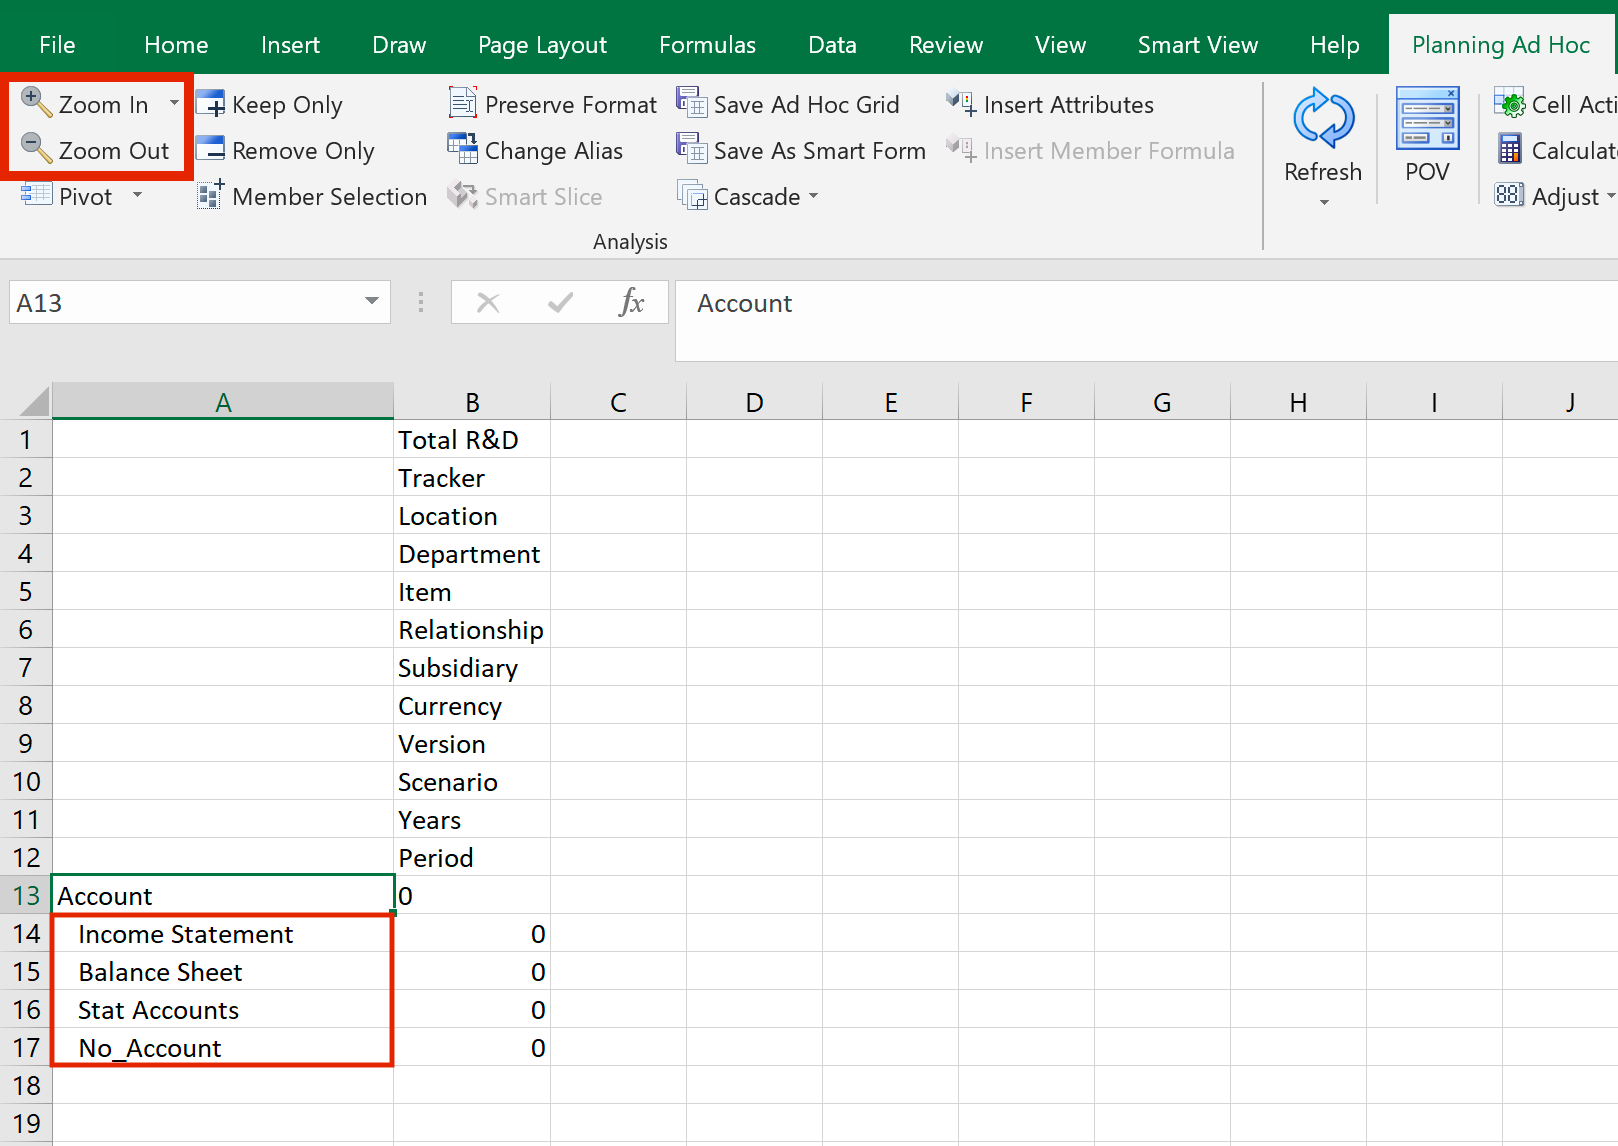
5. Instead of choosing member(s) from the Member Selection feature, you can also use Zoom In button in the Planning Ad Hoc ribbon. The Zoom In function controls the level of detail, you can view the next level, all levels, or bottom level detail in a dimension.
Note: You can also zoom in to the next level detail by double clicking on a member. You can zoom back out to a summary level by clicking on Zoom Out button.
In this example, the next level detail of Account are: Income Statement, Balance Sheet, Stat Accounts, and No Account.
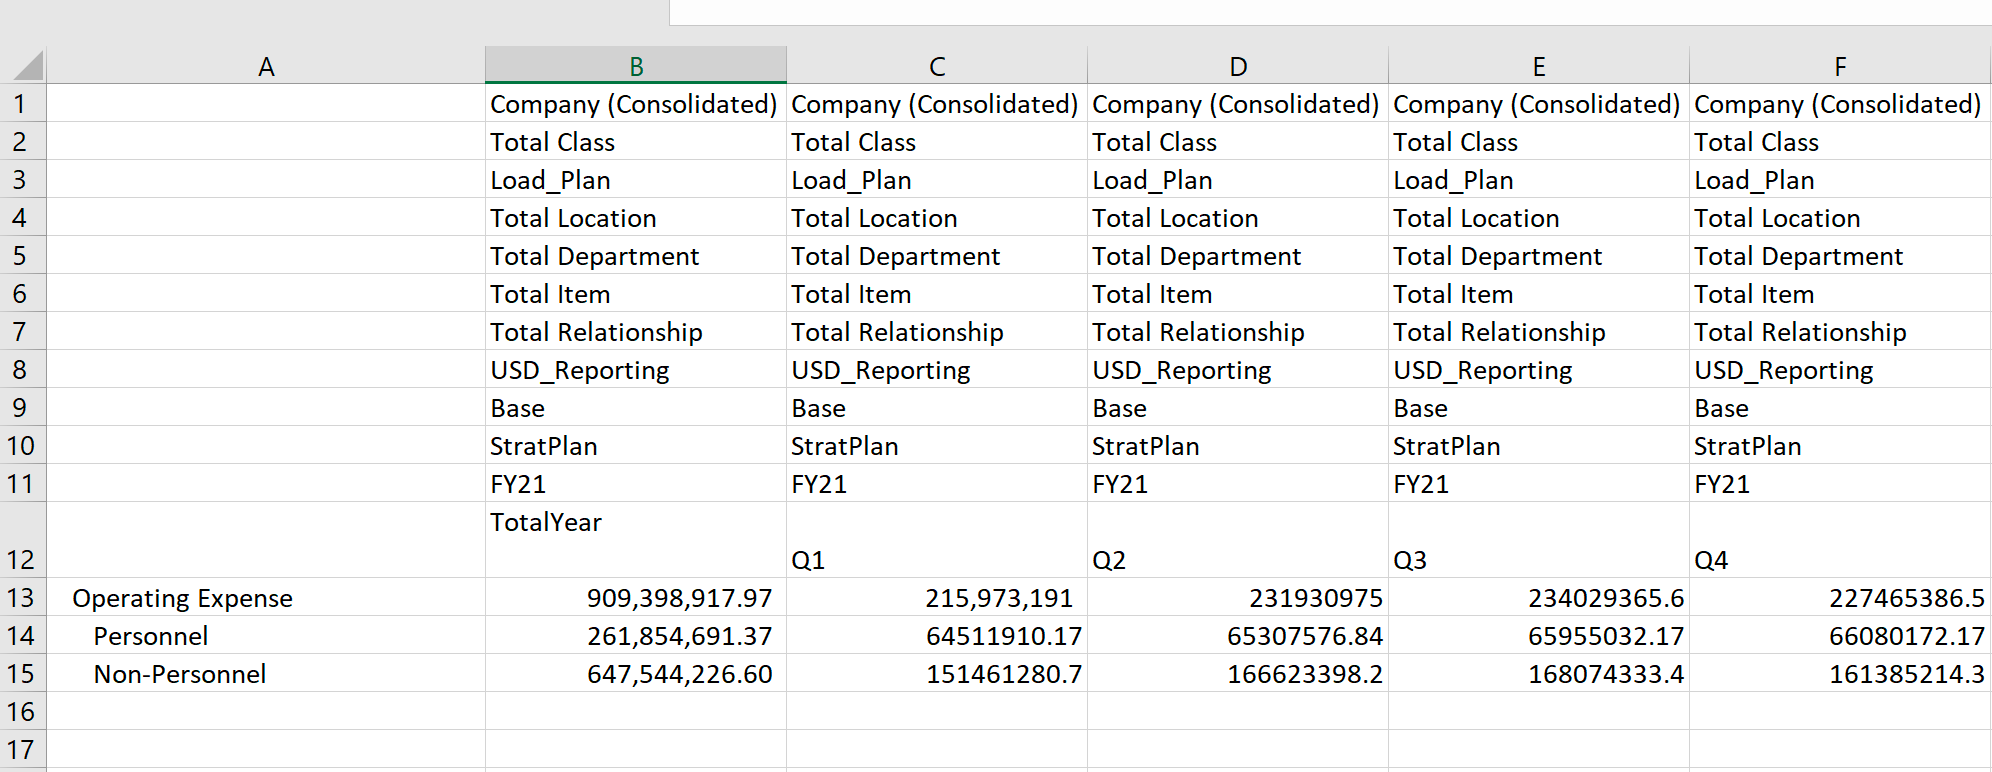
6. You can customize your ad hoc grid by keeping or removing selected members. In this example, our current ad hoc grid shows the total operating expense, broken down into Personnel and Non-Personnel, for all four quarters of FY21.
Let's say we want to review personnel expense data only for the first half of the year. To do so, we'll select the Personnel member and then click Keep Only button in the Planning Ad Hoc ribbon. Next, we'll select TotalYear, Q3 and Q4 and then click Remove Only.
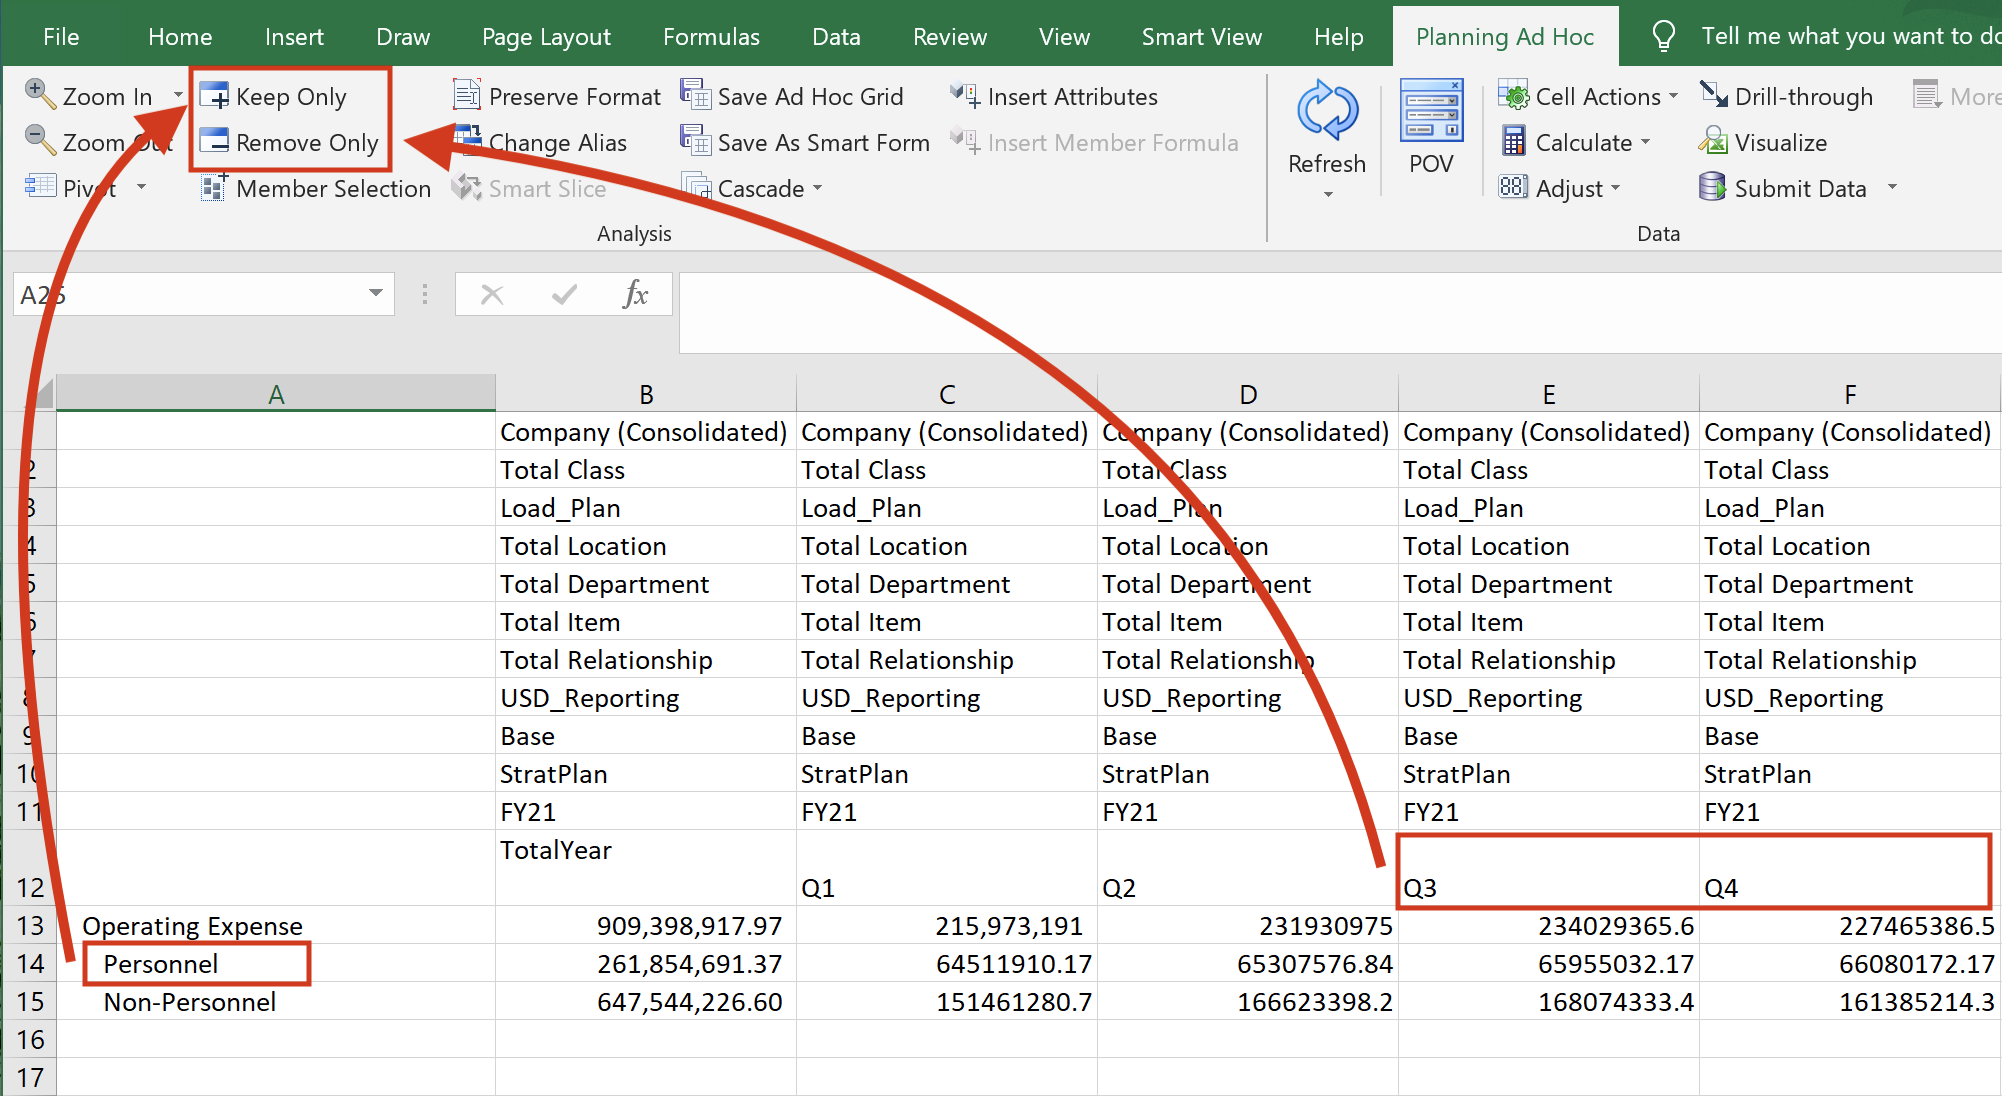
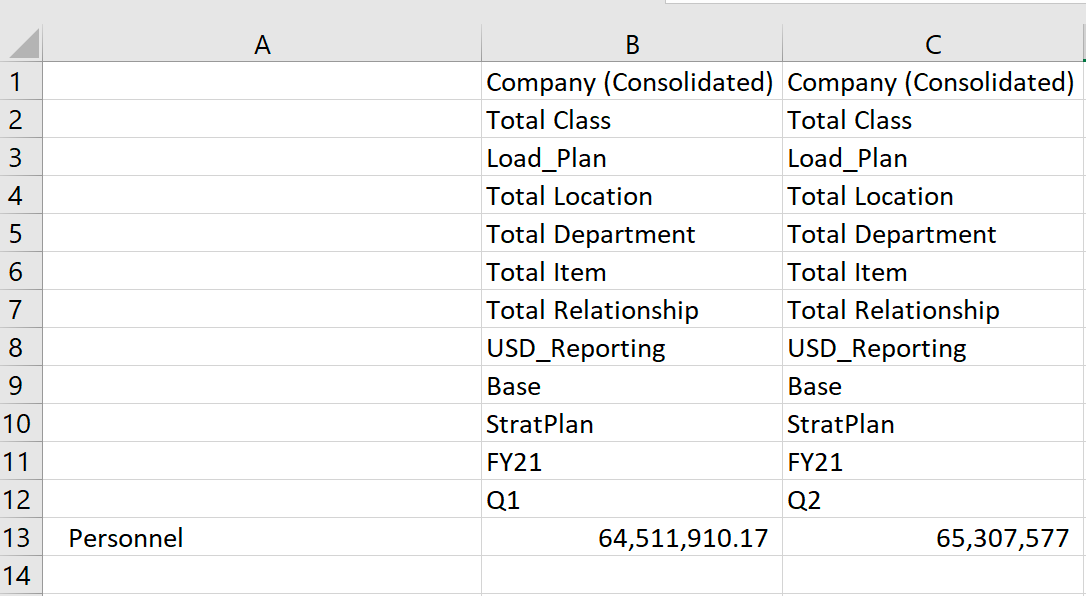
As a result, our ad hoc grid now shows personnel expense for Q1 and Q2.
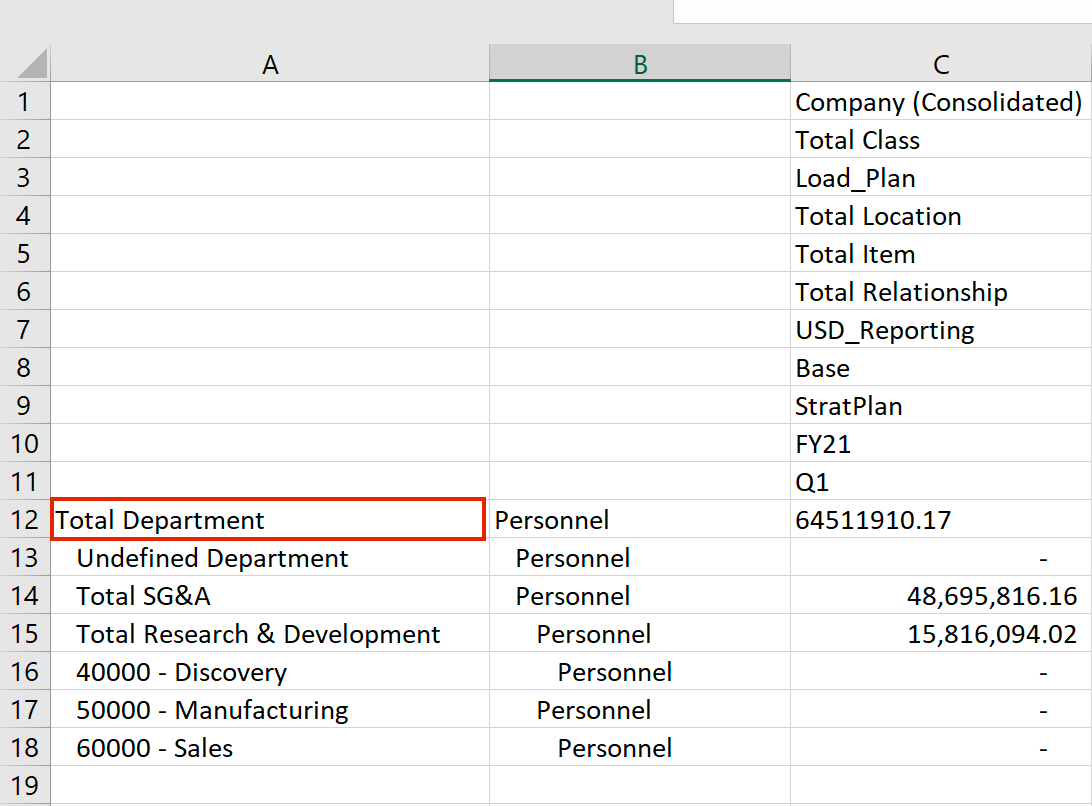
7. You can pivot dimensions to the POV, columns, or rows, depending on which axis the dimension you want to pivot is located on. For example, to pivot Department dimension that is currently in the columns, select the dimension and then click Pivot button in the Planning Ad Hoc ribbon.
Note: if the dimension is currently in the column, pivot action will move it to the row and vice versa.
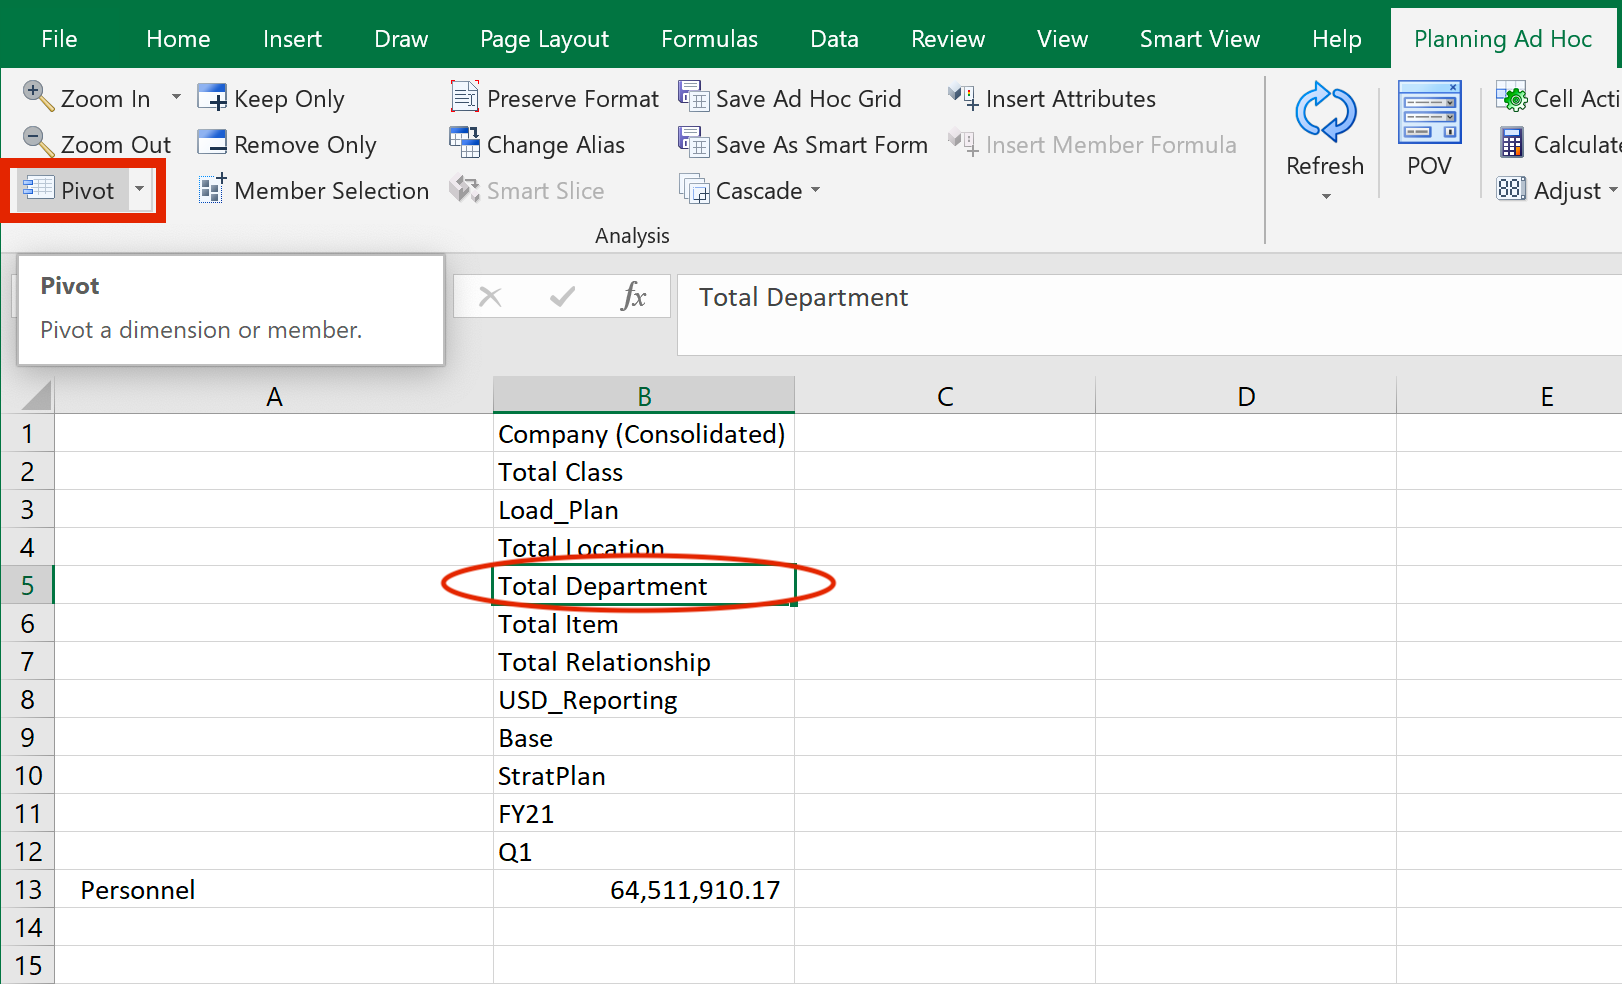
In this example, Total Department is pivoted to the rows and zoomed in to next level detail to show personnel expense for Q1 of FY21 at: Undefined Department, Total SG&A, Total R&D, etc.
Now that you've learned the basic Planning Ad Hoc tasks and actions mentioned in this post, you can combine all of them to build your own basic ad hoc report such as the P&L report below. Stay tuned for more Smart View tips and tricks.

Source: Oracle EPM Tutorials
Want to Learn More?
If you would like a free consultation please contact Gerard at Redhill Business Analytics via email or the contact form below.