

In this blog post, we'll show you how to import and export metadata from Oracle Planning and Budgeting Cloud.
Export Metadata
Administrators can export metadata from PBCS to a flat file in .csv or .txt format using the following steps:
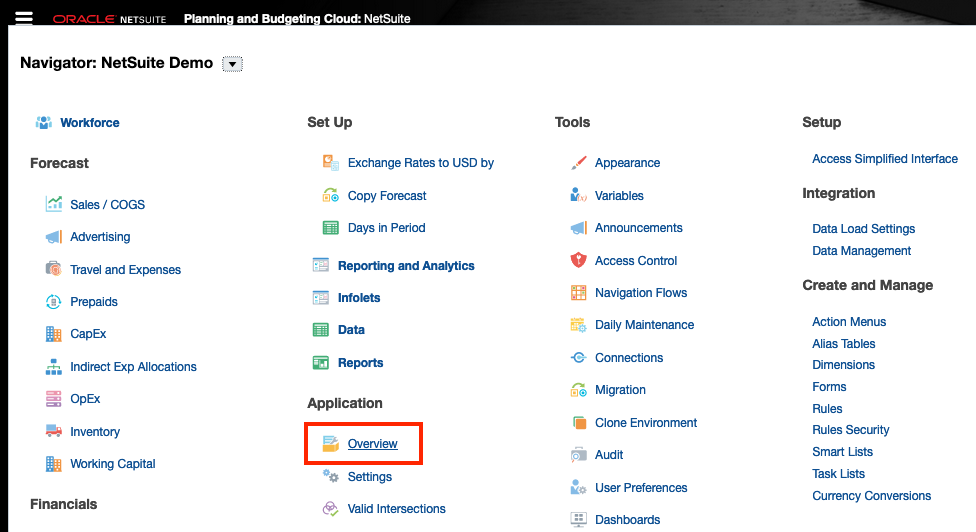
- In PBCS, navigate to Application > Overview.
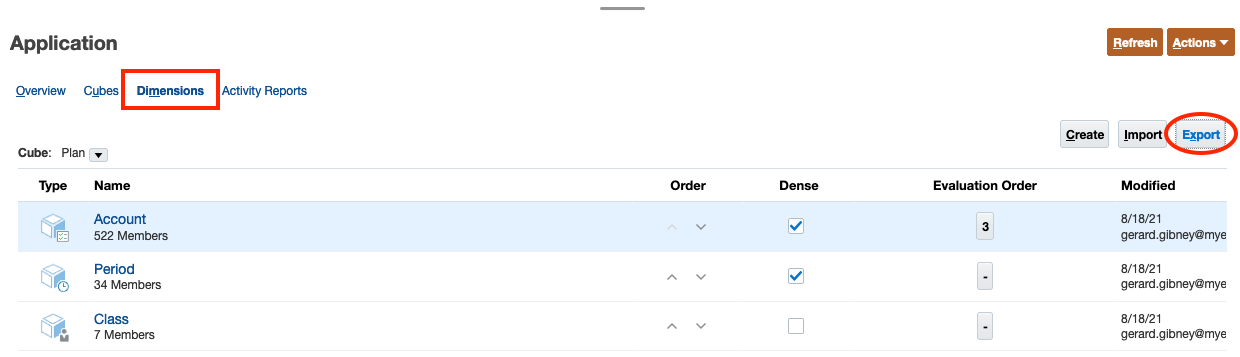
2. Select Dimensions > Export.
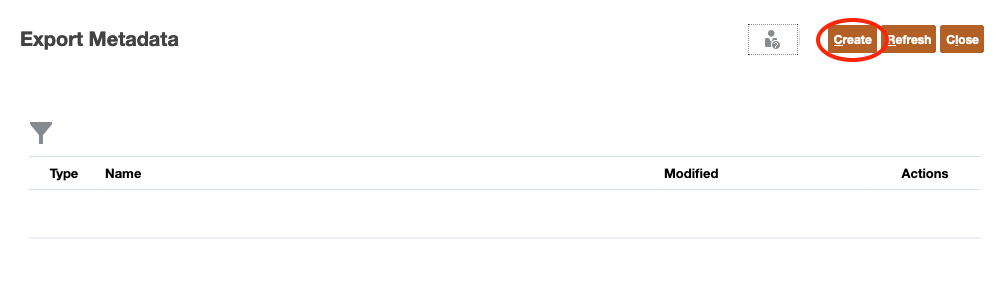
3. On the Export Metadata window, click Create.
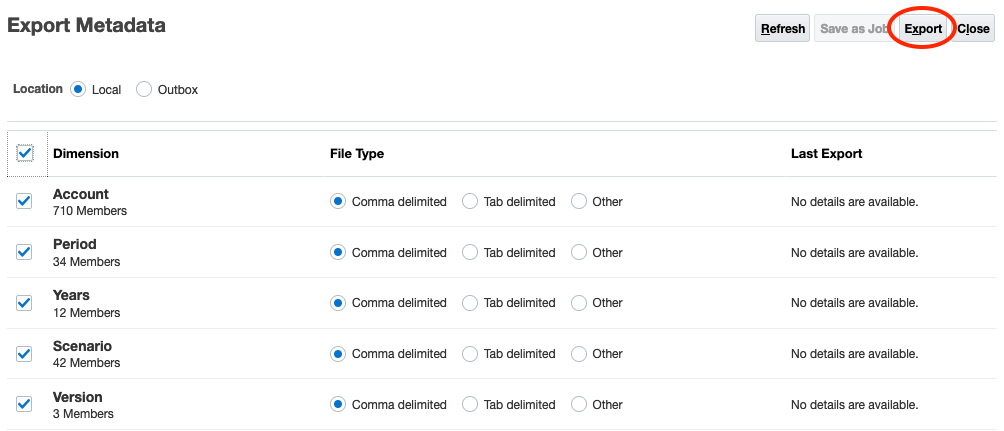
4. Location determines where you want to export your metadata file to: local (your computer) or outbox (the server). Exporting to the server allows you to save your job selections and run it at a later time. You can export one or more dimensions, attributes, UDAs, and smart lists.
Exporting metadata locally
4a. Select Local as your Location.
5a. Select the dimension(s) you want to export. If you want to export all dimensions, click the Dimension checkbox above Account.
6a. Select File Type, i.e. file delimiter.
7a. Click Export.
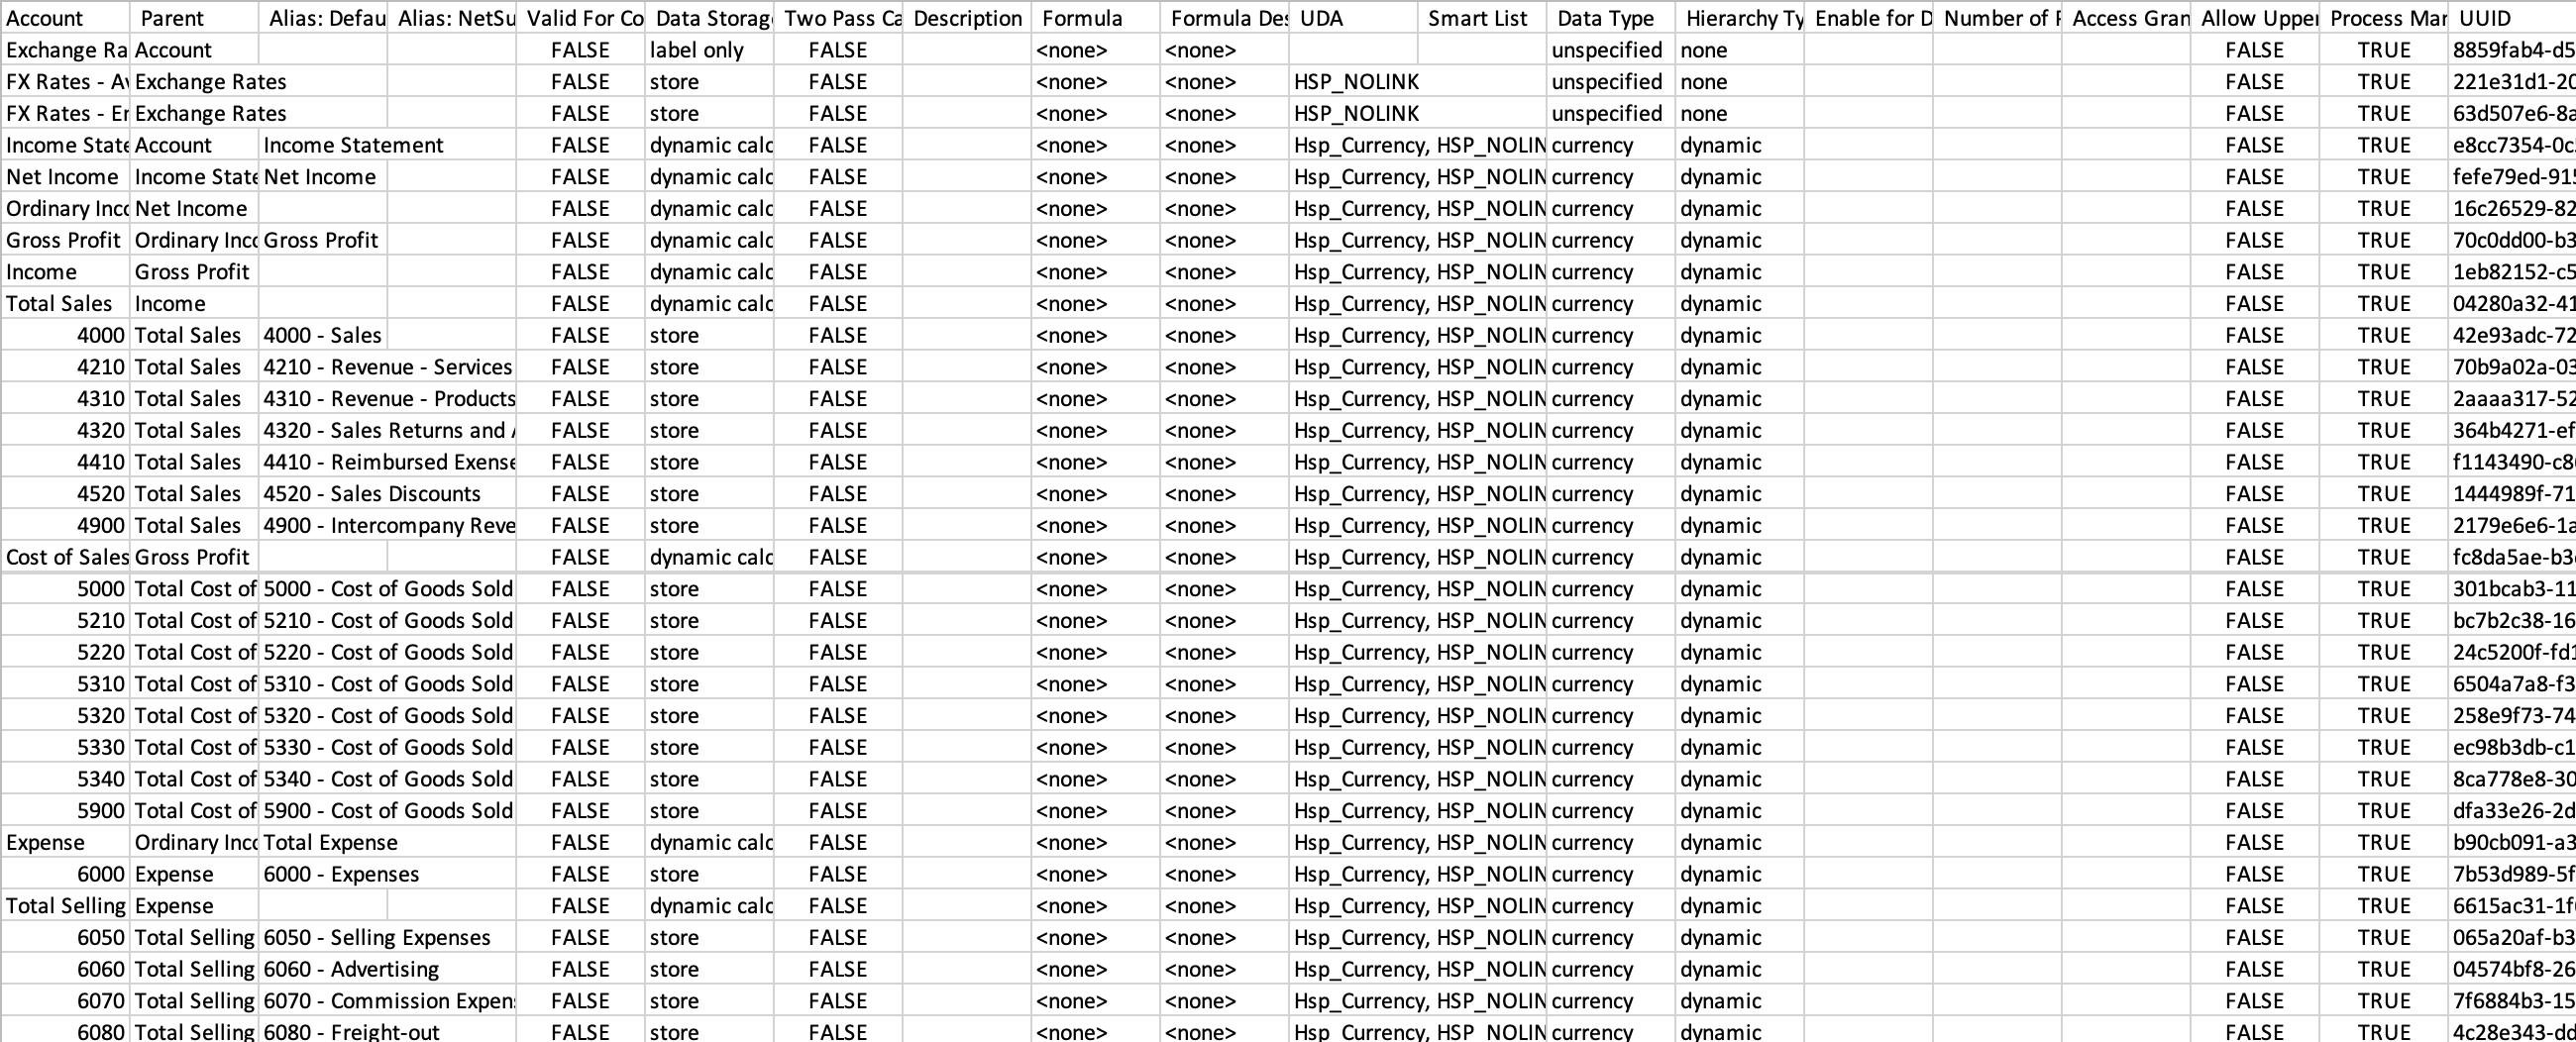
8a. Save the compressed metadata file to your computer. Below is an example of the exported file in .csv format, structured based on the formatting requirements of PBCS. The file contains a header row and a list of records under the header row.
Exporting metadata to the server
4b. Select Outbox as your Location.
5b. Select the dimension(s) and the file delimiter for each artifact.
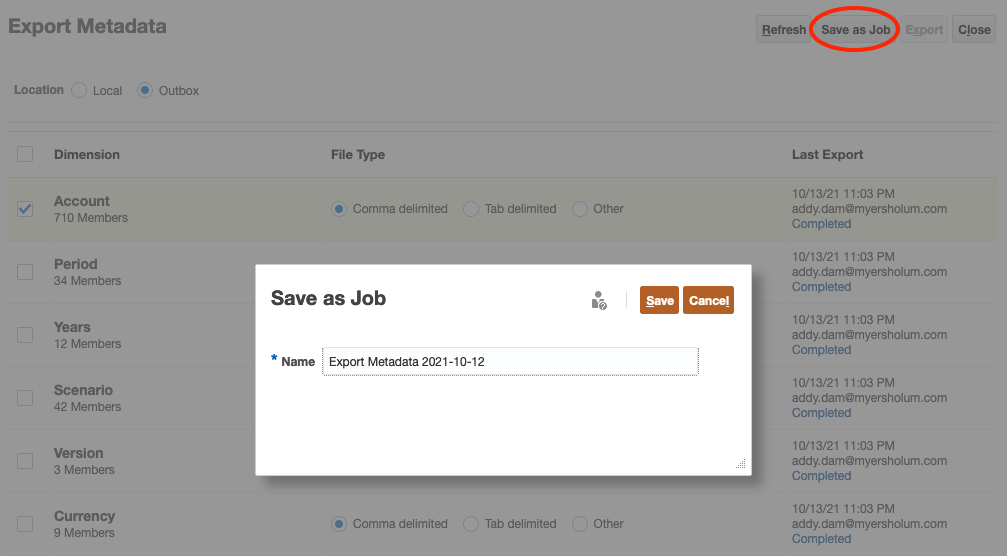
6b. Click Save as Job and give your metadata export file a name. Click Save.
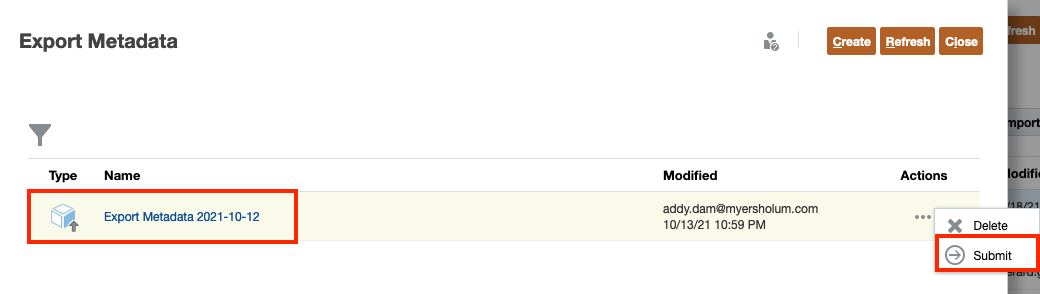
7b. Exit to the Export Metadata window where you can see the export job that was created. Select the job > Action > Submit.
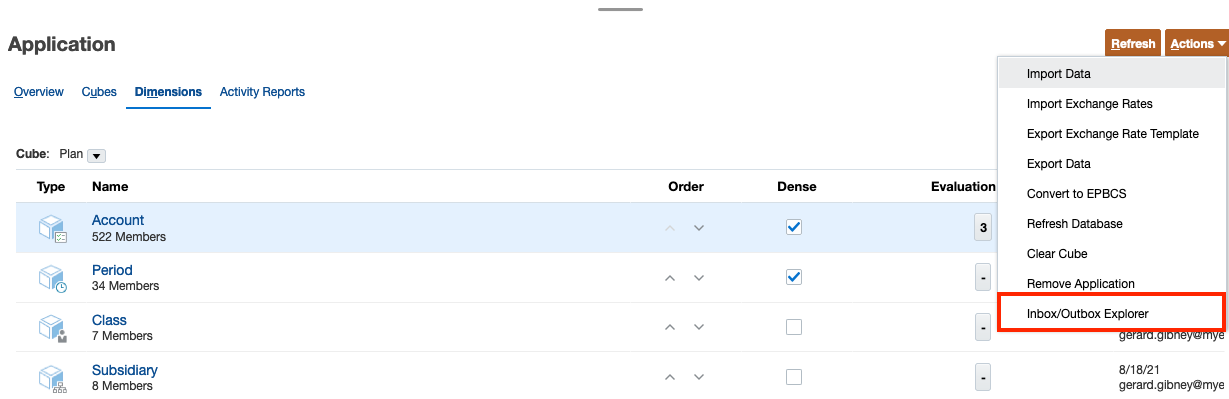
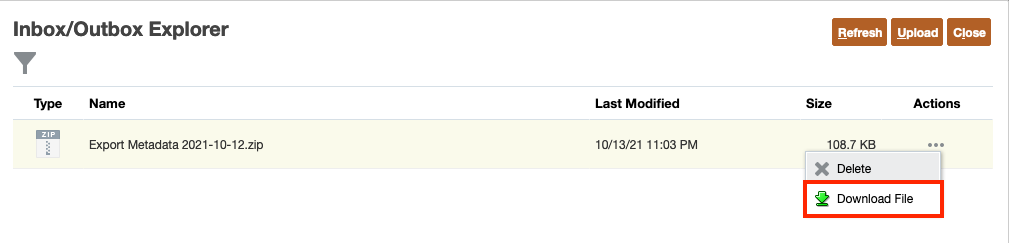
8b. The metadata has now been exported to the server. You can find the export job in Application > Dimensions > Actions > Inbox/Outbox Explorer.
9b. You can also download the export file to your local computer from here: in the Inbox/Outbox Explorer, select the job > Actions > Download File.
10b. Using the export job saved to the server, you can now schedule the job to be run at a later time in Applications > Jobs. If you don't know how to schedule a job in PBCS, check out our other blog post on Scheduling Data Backups in Oracle PBCS. In stead of using "Export Data", you will use "Export Metadata" as your job type in this scenario.
Import Metadata
In order to import metadata in PBCS, your metadata files must be in .csv or .txt format using valid file delimiters. Refer to Exhibit 1 in Export Metadata section of this blog post for the metadata file formatting requirements. The quickest way to obtain the correct import file format is to run the metadata export process and use that as a template.
Administrators can import metadata into PBCS using the following steps:
- Navigate to Application > Overview.
- Select Dimensions > Import > Create.
- Importing from a local file runs the import process immediately, while importing from the server allows you to save your job selections and schedule it to run at a later time. Similar to Exporting metadata, you can import one or more dimensions, attributes, UDAs, and smart lists.
Importing metadata locally
3a. Select Local as your Location.
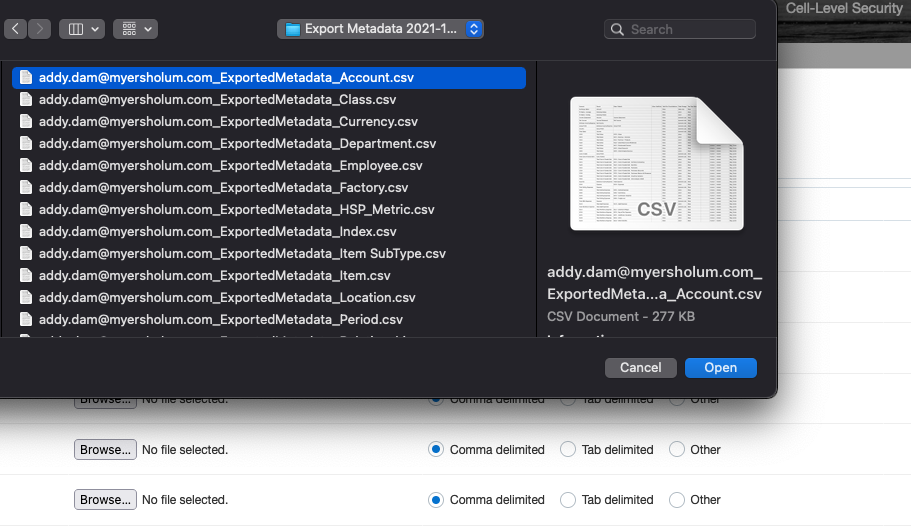
4a. Browse the import file(s) from your computer.
5a. Select a file delimiter for each artifact that you want to import, e.g. select comma delimited for .csv file.
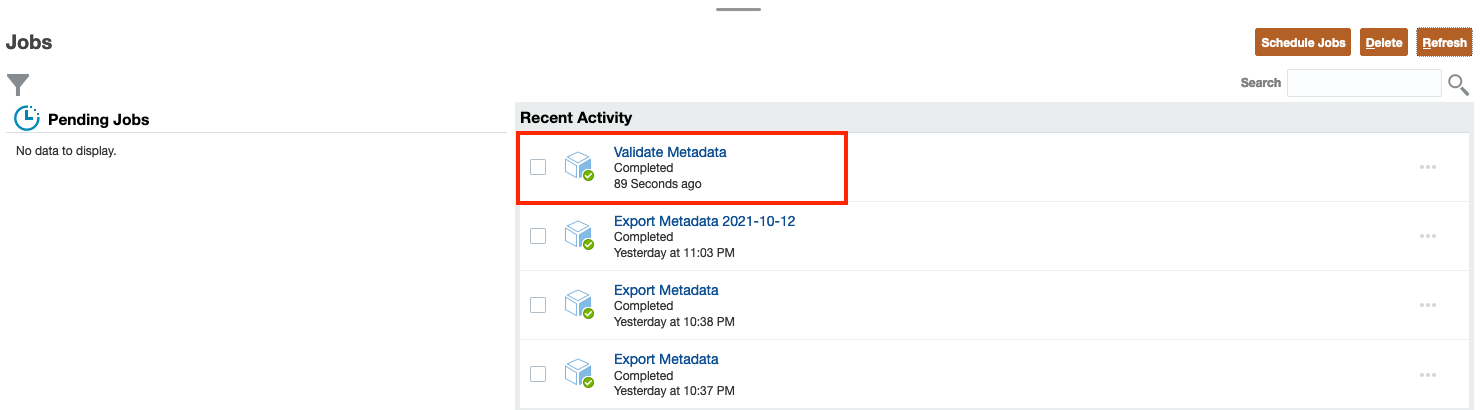
6a. Validate your metadata file(s) before running the import process.
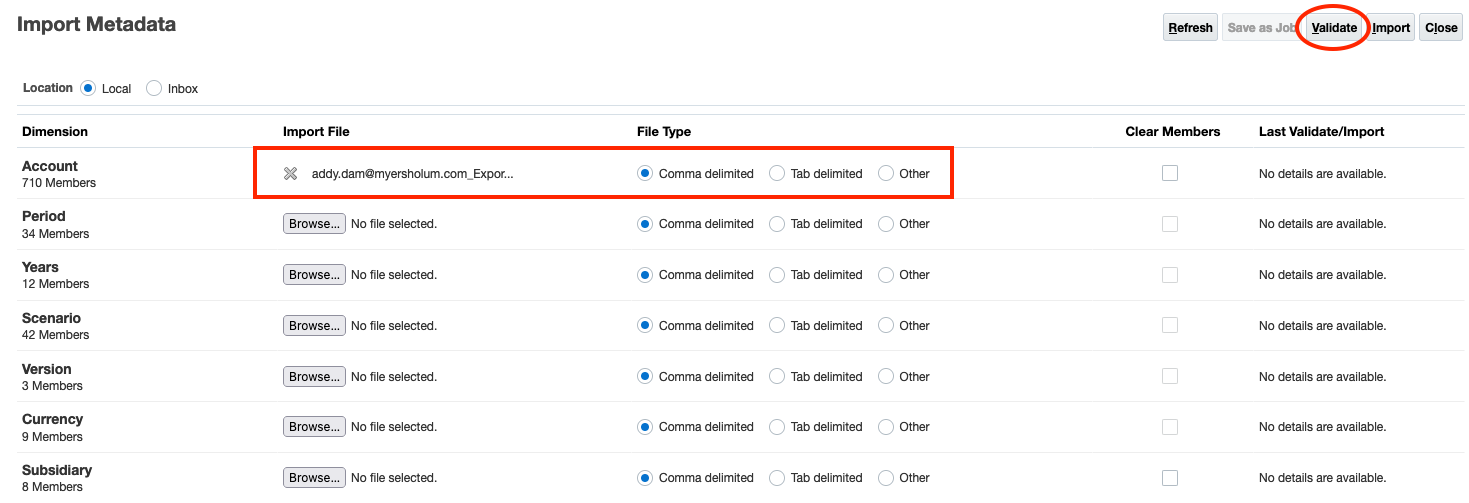
7a. You can check the status of the validation process in Application > Jobs. If errors are found, modify the import file and re-validate until no errors are found. When your validation status displays a green check mark (i.e. no errors), return to Import Metadata window and re-enter your selections.
8a. For each artifact that you're importing, there is a Clear Members option. If Clear Members is selected, any member not specified in the import file will be deleted from PBCS after the import process. If Clear Members is not selected, the import process will only add or update existing members.
9a. Confirm your selections and click Import to run the metadata import process.

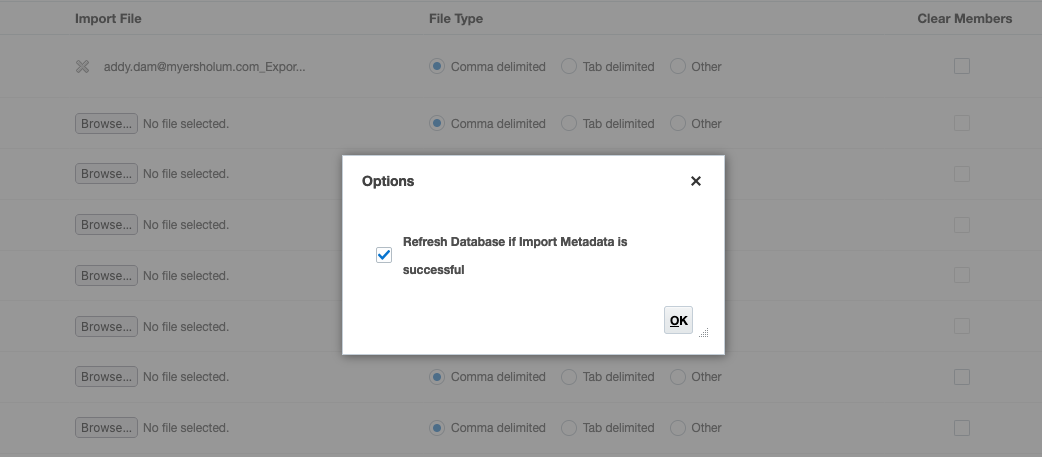
10a. In the Options window, select Refresh Database and click OK. Verify that your metadata was imported successfully in Application > Jobs.
Importing metadata from the server
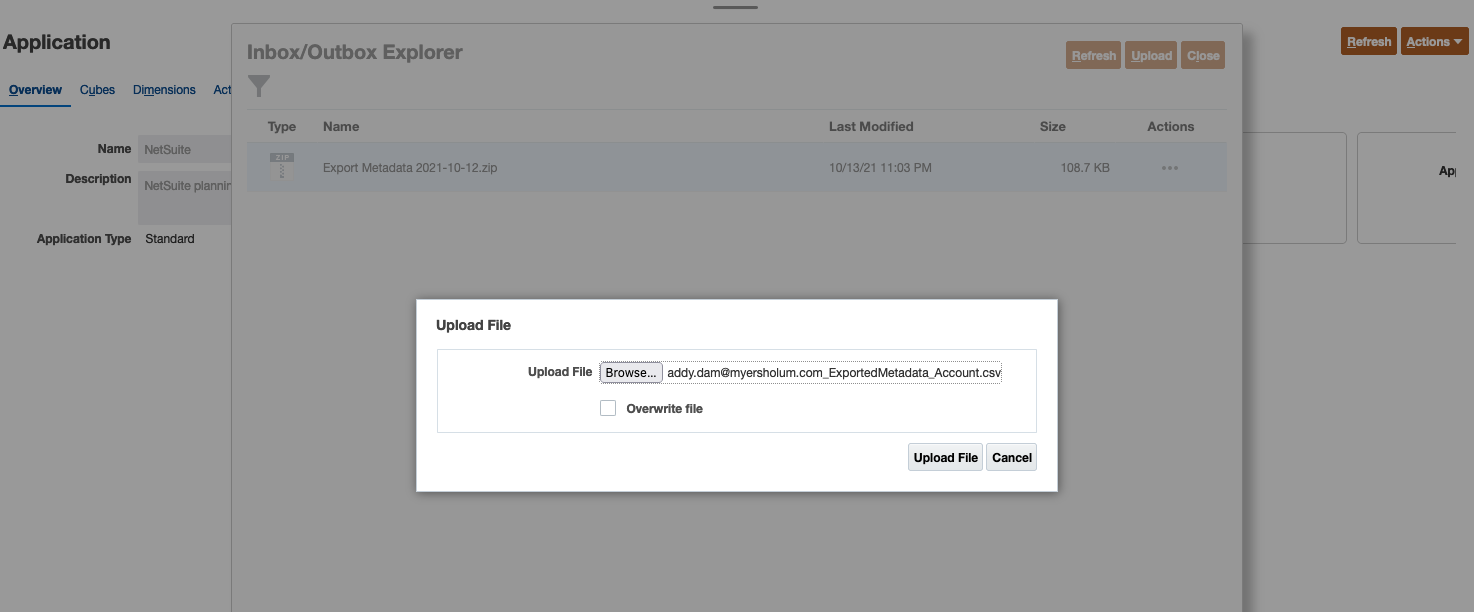
3b. Navigate to Inbox/Outbox Explorer to upload metadata files that you will need for importing on the server. Once your metadata files have been uploaded to the server, navigate to Import Metadata window.
4b. Select Inbox as Location.
5b. In the Import File field for each artifact, enter the exact filename.
6b. Select the correct file delimiter.
7b. Validate your metadata file(s) before running the import process.
8b. Optional: select Clear Members if you want to delete members not specified.
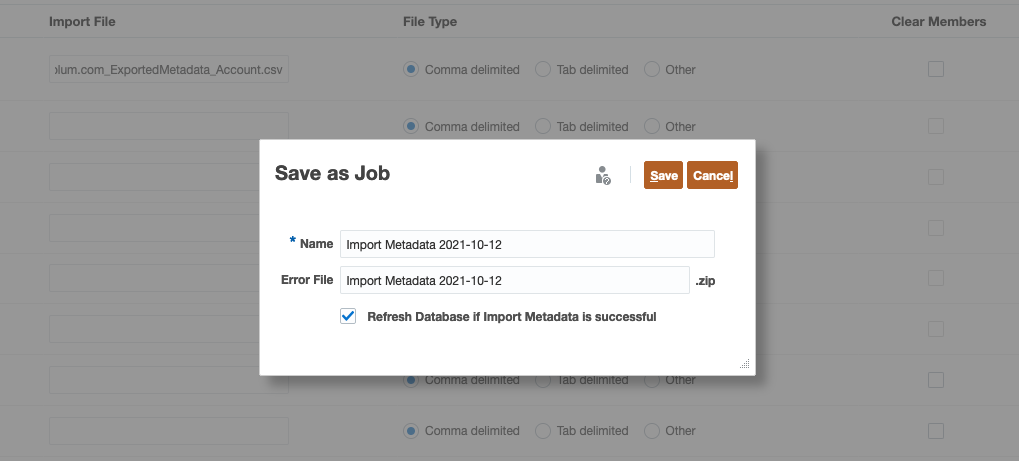
9b. Confirm your selections and select Save as Job and give your job a name.

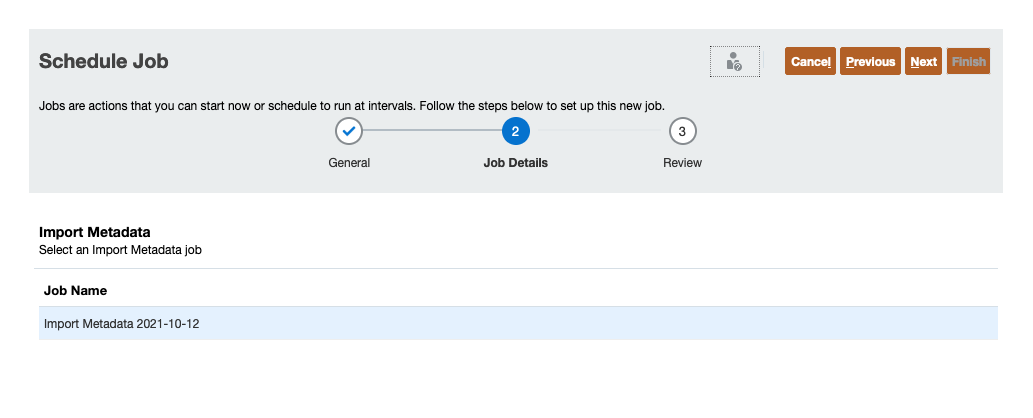
10b. Once the job is saved to the server, you can run the import process immediately or schedule it to run at a later time in Application > Jobs. Refer to our Scheduling Data Backups in Oracle PBCS blog post to learn how to schedule a job.
Want to Learn More?
If you would like a free consultation please contact Gerard at Redhill Business Analytics via email or the contact form below.