

In this post, we'll demonstrate how to export and import data in NetSuite Planning and Budgeting Cloud (PBCS).
PBCS allows you to export and import data using flat files. You can use the file as a backup for your Planning application data, or as a template for importing data into multiple dimensions in Planning application.
You can export to and import from a local folder or the cloud server. When running the export/import process locally, you run the job immediately. When you run the export/import process using the server, you have to first save your job selections, and then you can either run the job right away or schedule it to run at a later time.
Exporting Data
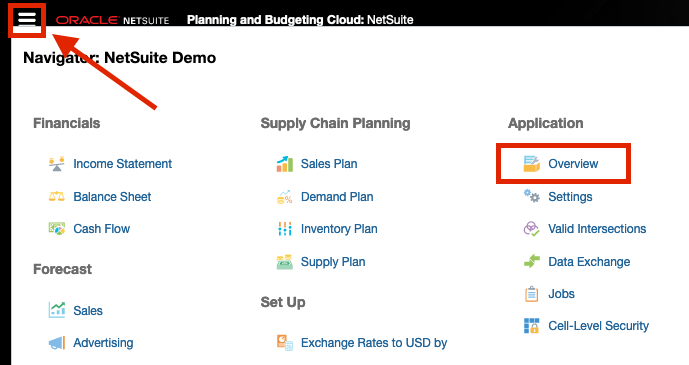
- Open the navigator > Application > Overview.
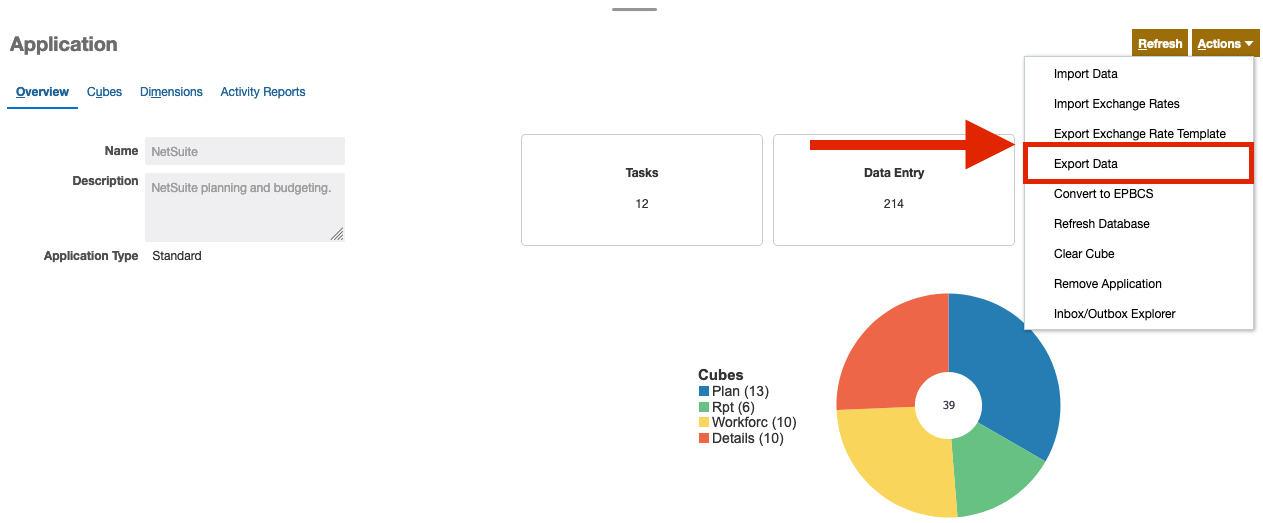
2. Actions > Export Data.
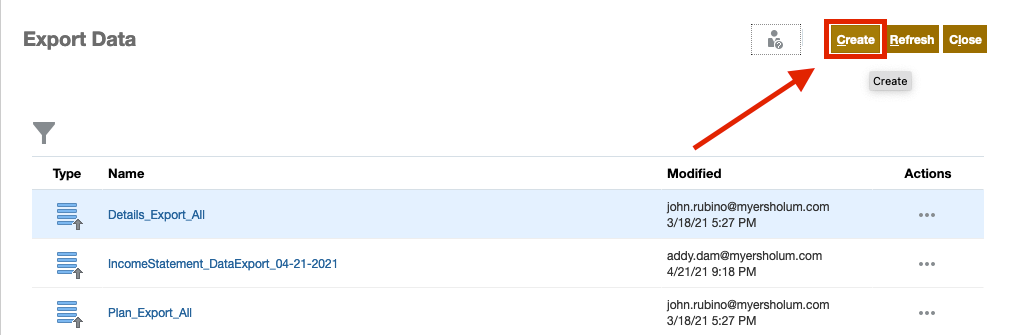
3. From the Export Data window, click Create.
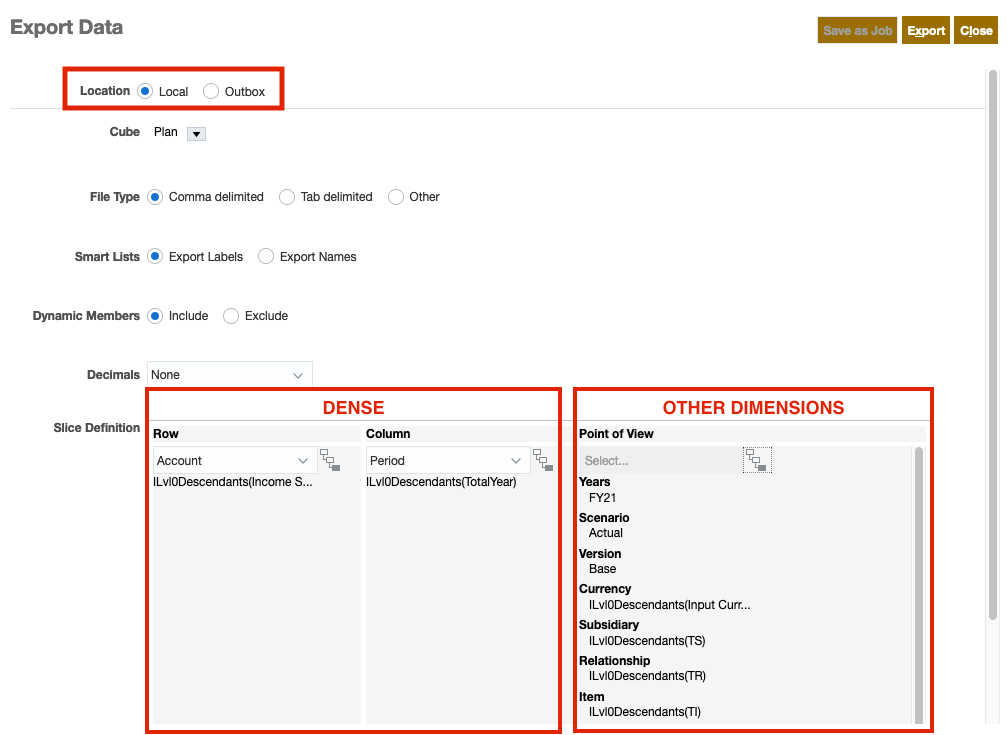
4. Make your data export selections.
- In Location, select Local if you want to export to a local computer or Outbox if you want to export to the server.
- Select the Cube you are exporting from, e.g. Plan.
- Select the File Type, e.g. Comma delimited.
- Export labels or names for Smart Lists.
- Include or exclude Dynamic Members during export.
- Select number of Decimals.
- In Slice Definition, select members for the row, column, and POV.
Note: select dense dimensions for the row and column, and the rest of the dimensions for the POV.
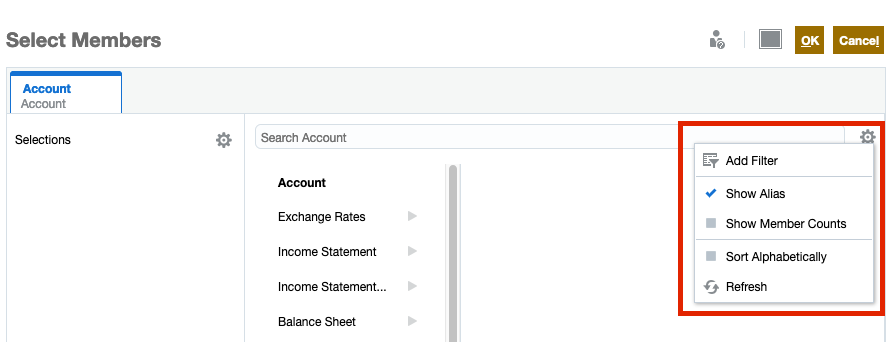
5. To select dimension members, click on the hierarchy icon to the right of the dimension drop-down. You can either select individual member or use function selector fx to make multiple selections. You can also use the search bar to find specific members.
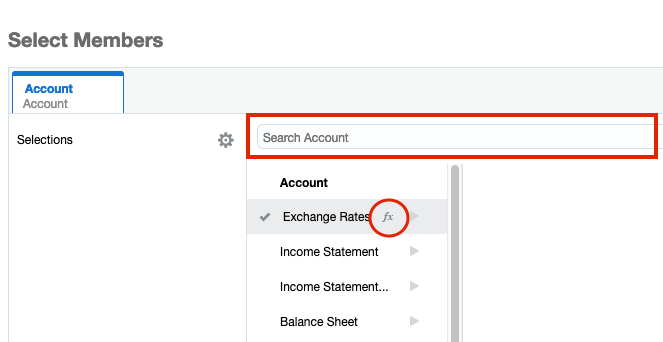
When selecting members, there are a few actions that you can take by clicking on the setting cog button:
- Use filter criteria
- Show or hide member alias
- Show or hike member count
- Sort members
- Refresh page
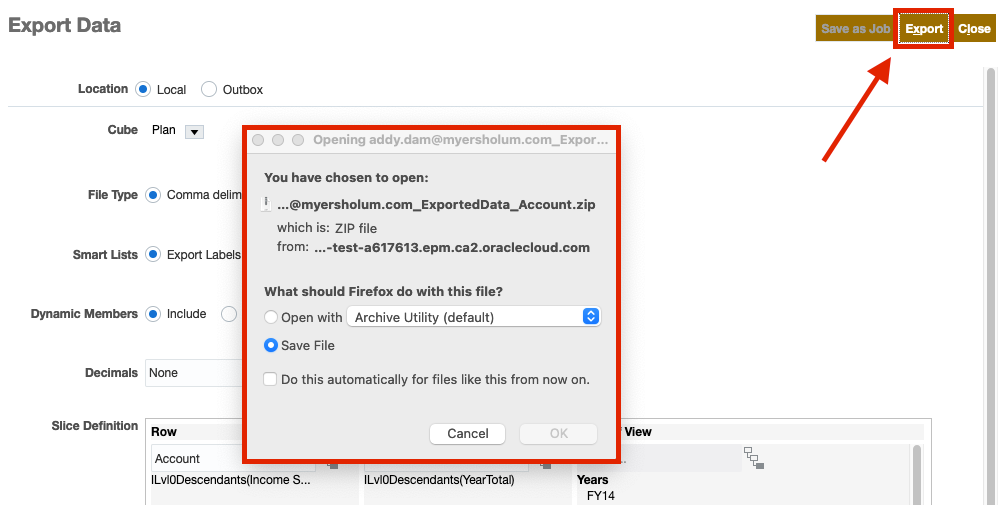
6. Verify your selections before clicking Export. When prompted, select Open or Save File to your local folder.
7. Instead of saving the export file to the local folder, you can export the same file to the server. To do so, click Outbox for Location, then click Save as Job.
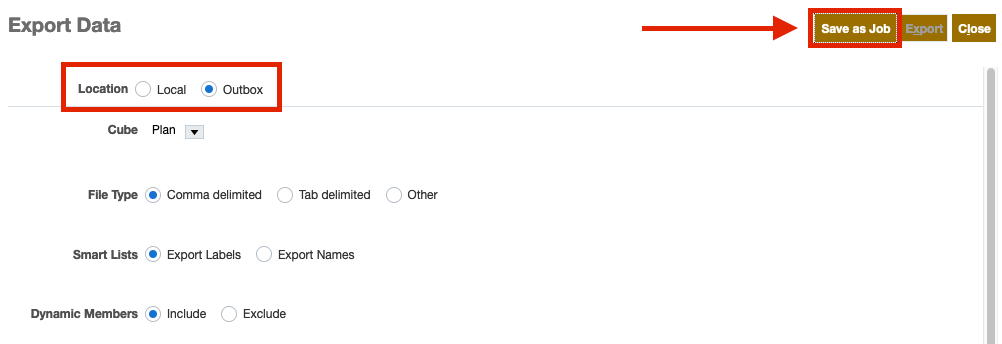
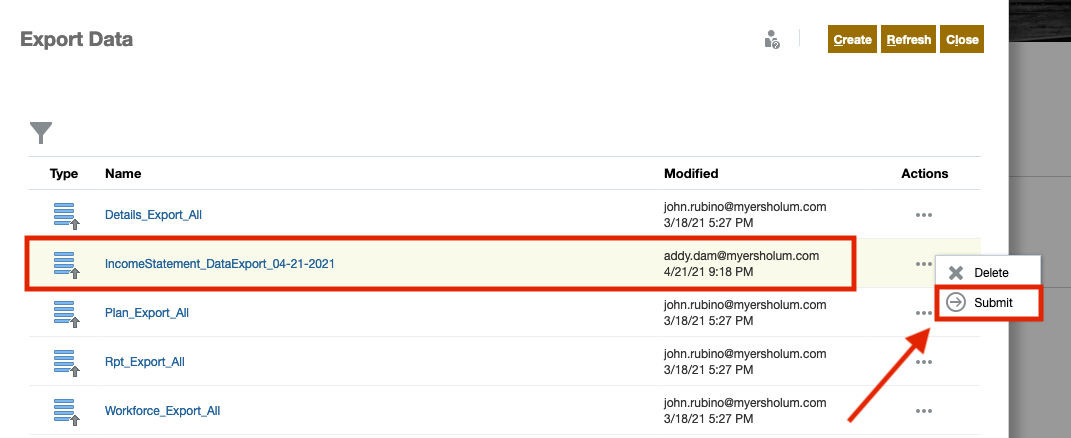
8. Give the file a name and click Save.

9. You can see the job listed in the Export Data window. Click Submit.
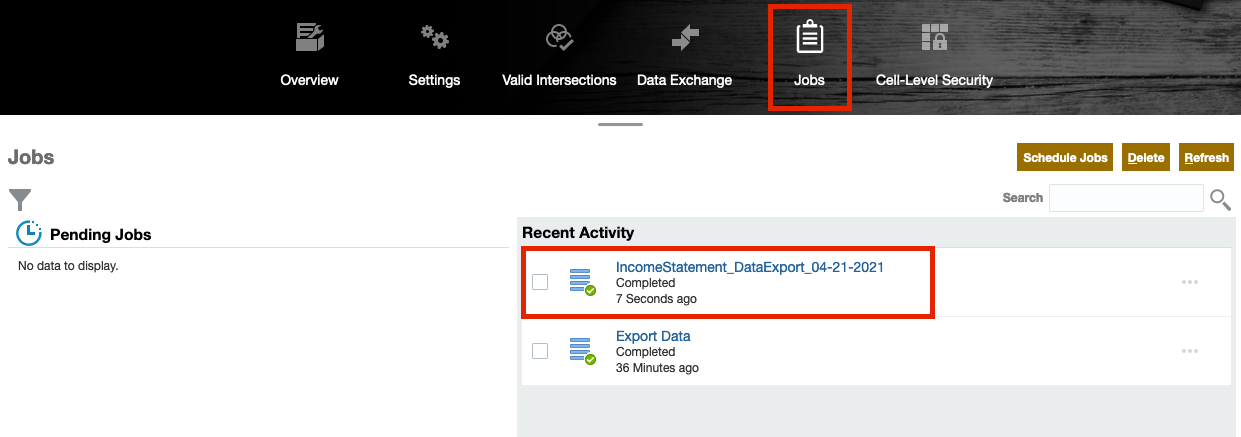
10. Go to Jobs and verify the status of the job that you submit. A green check mark means the job completed successfully.
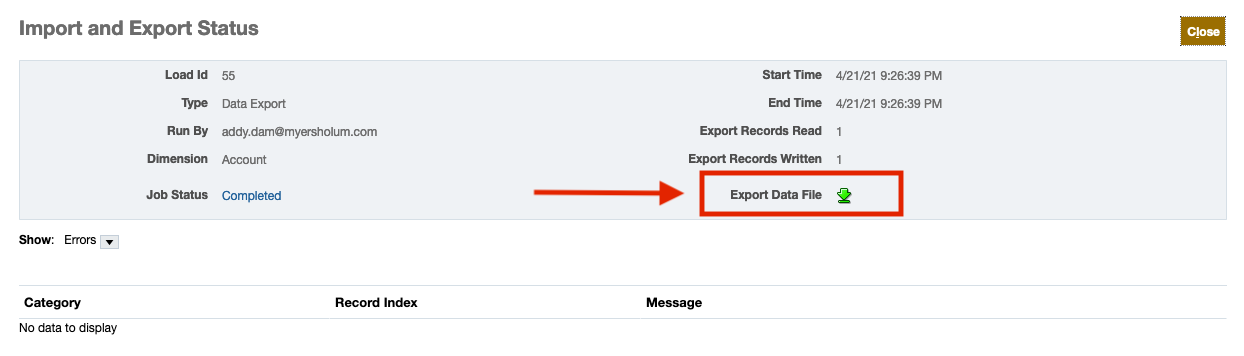
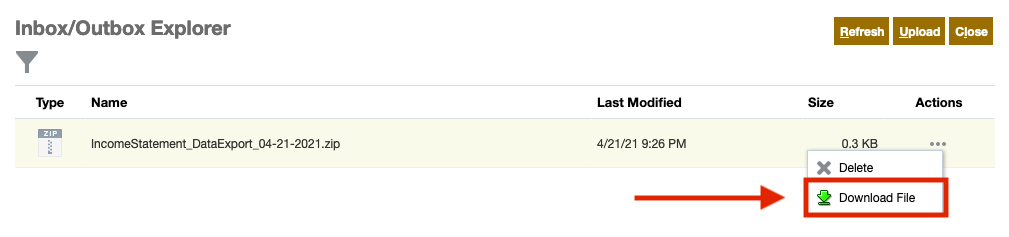
11. You can download the data file from Import and Export Status page:
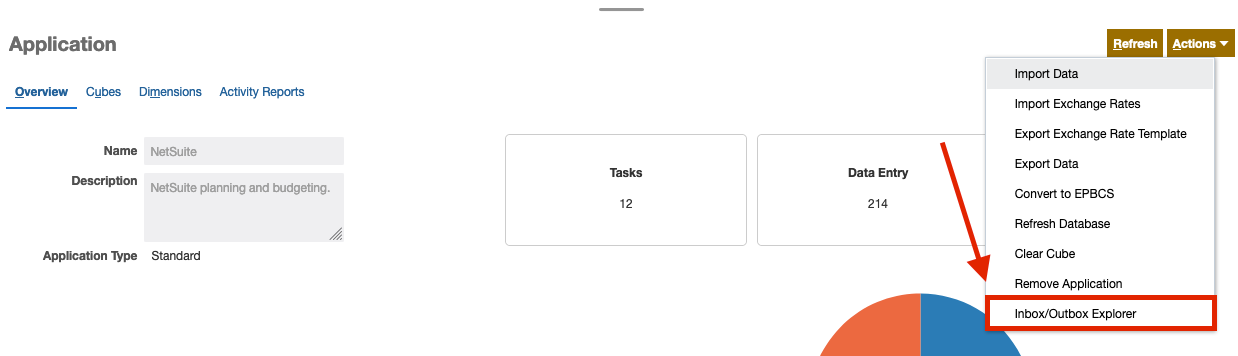
or from Inbox/Outbox Explorer:
Importing Data
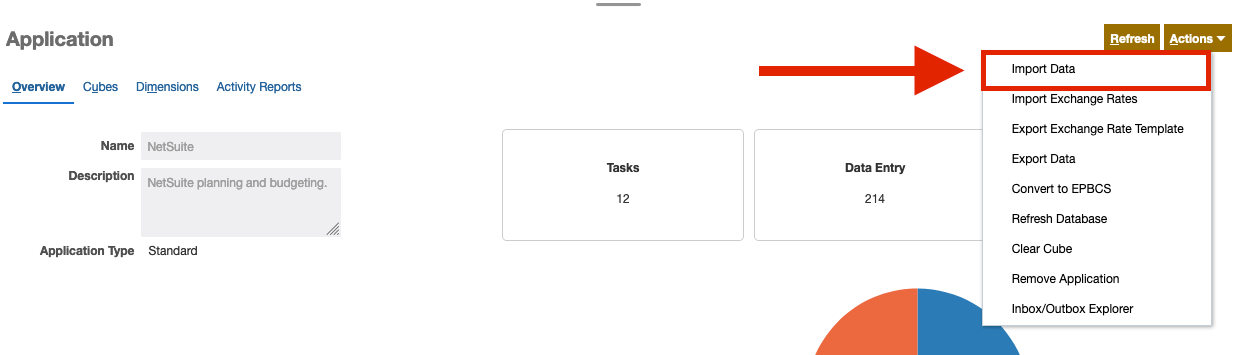
- Open the navigator > Application > Overview.
2. Actions > Import Data.
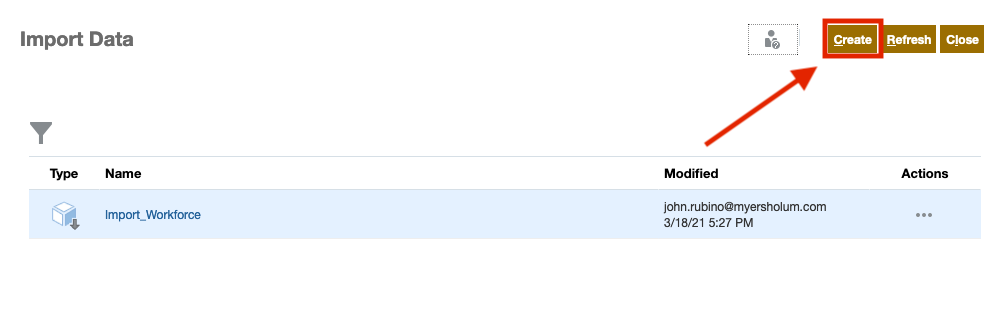
3. From the Import Data window, click Create.
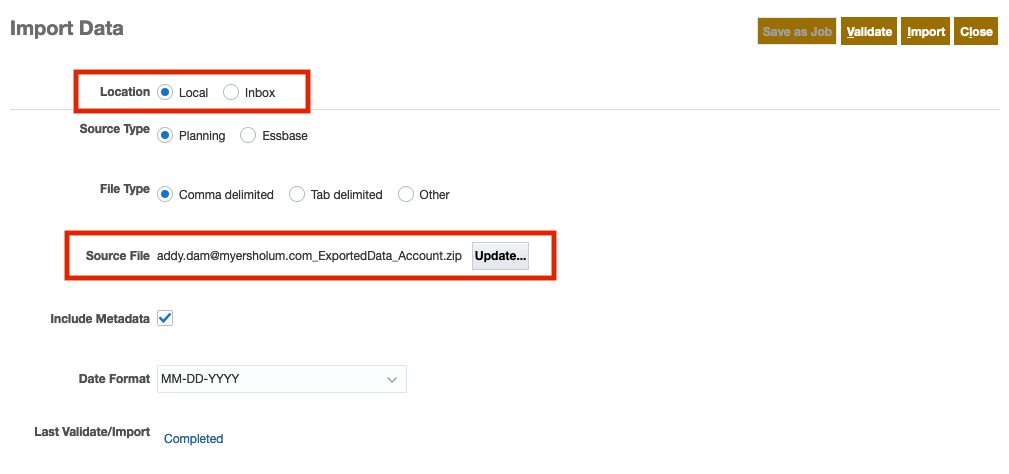
4. Make your import data selections.
- In Location, if you're importing a file stored on the local folder, select Local. If you're importing a file on the server, select Inbox and specify the exact name of the data file stored on the server.
- Select Source Type depending on how your data file is structured.
- Select File Type, i.e. the delimiter used in your data file.
- Browse Source File from the local folder.
- Select whether to include metadata at the same time you import data. Note: Include Metadata is selected by default. If you leave this unchecked, make sure the required metadata already exist in the application prior to importing.
- Select Date Format.
5. Validate your data file before running the import process. If errors are found, modify the file as required and re-validate.
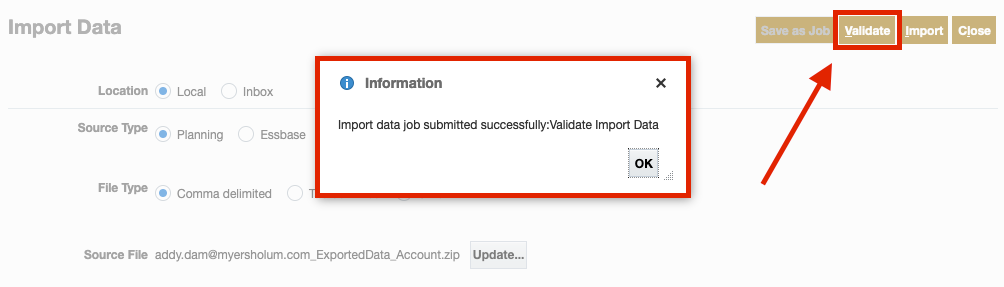
To check the status of the validation job, close out the Import Data window. Go to Jobs and verify that your import file validated successfully.
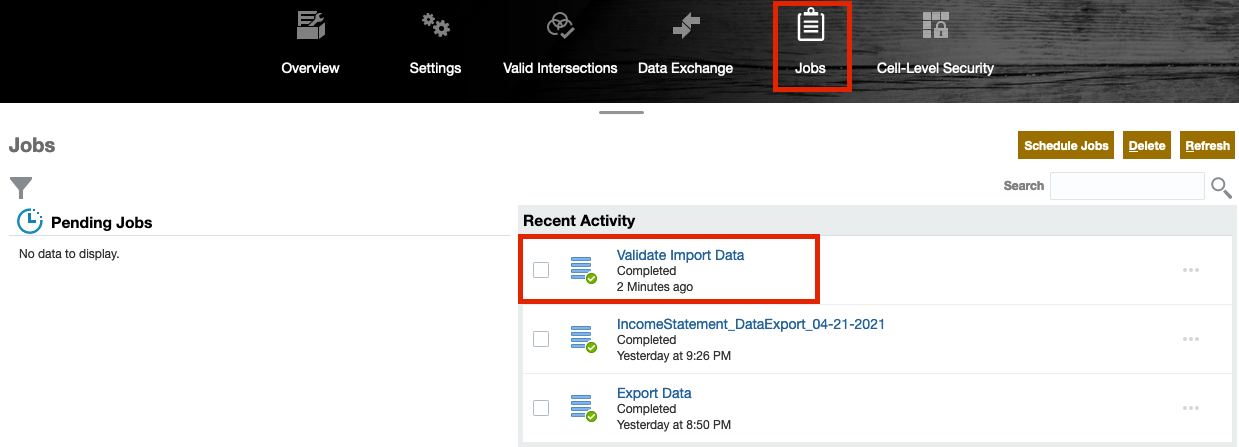
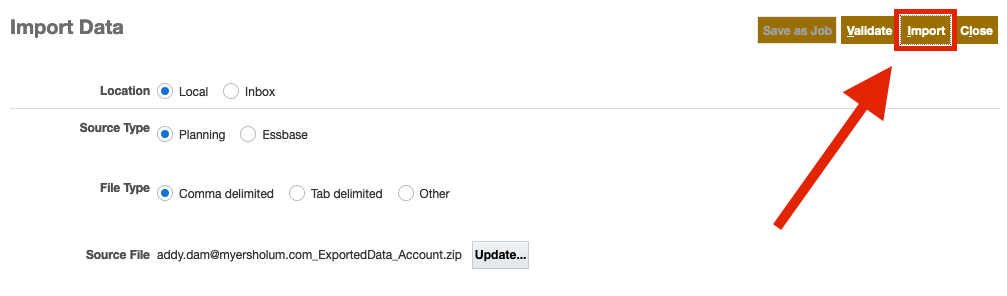
After validating that your import file has no errors, return to Import Data window and repeat step 4. Then click Import.
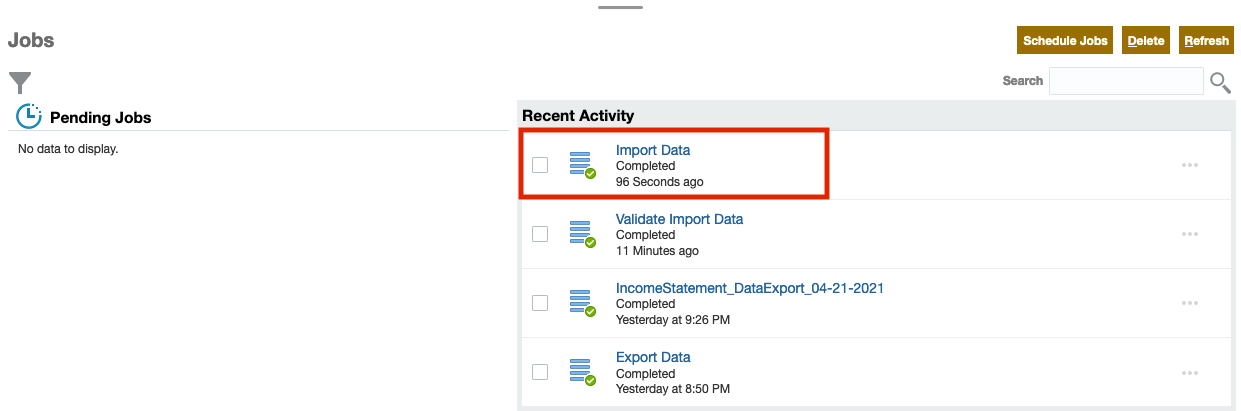
6. Verify that your data file was imported successfully in Jobs.
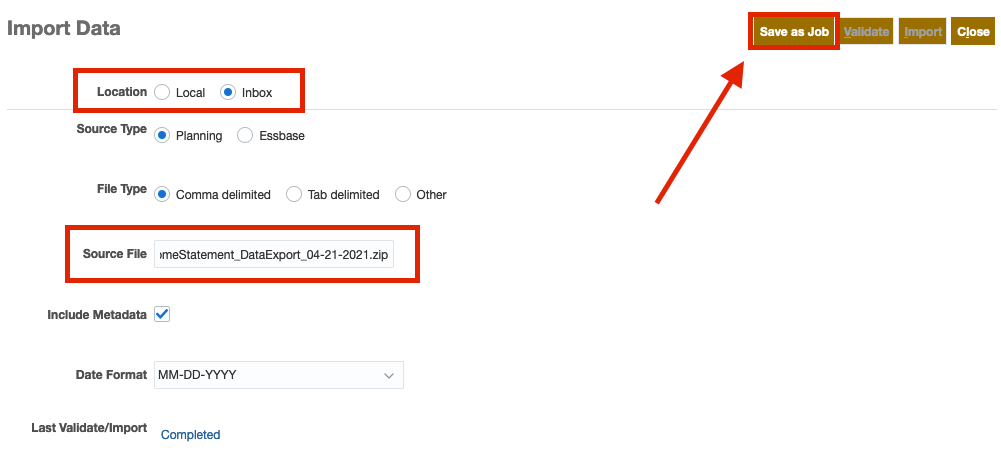
7. Instead of importing data locally, you can import data using an existing data file on the server.
- For Location, select Inbox.
- In the Source File, type the name of the file saved to your Inbox/Outbox Explorer. Let's import the same data file that we previously exported: IncomeStatement_DataExport_04-21-2021.zip.
- Click Save as Job.
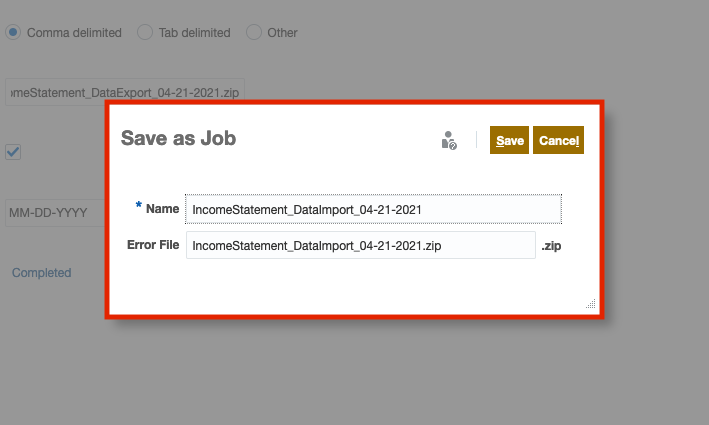
8. Give the file a name and click Save.
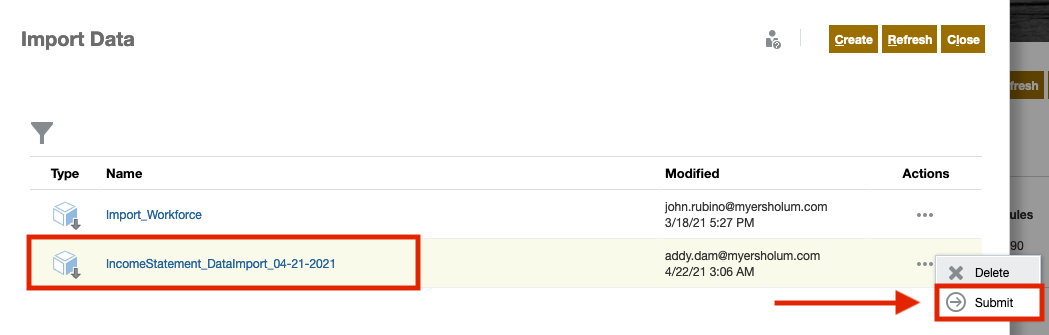
9. You can see the job listed on the Import Data window. Submit the job using Actions menu.
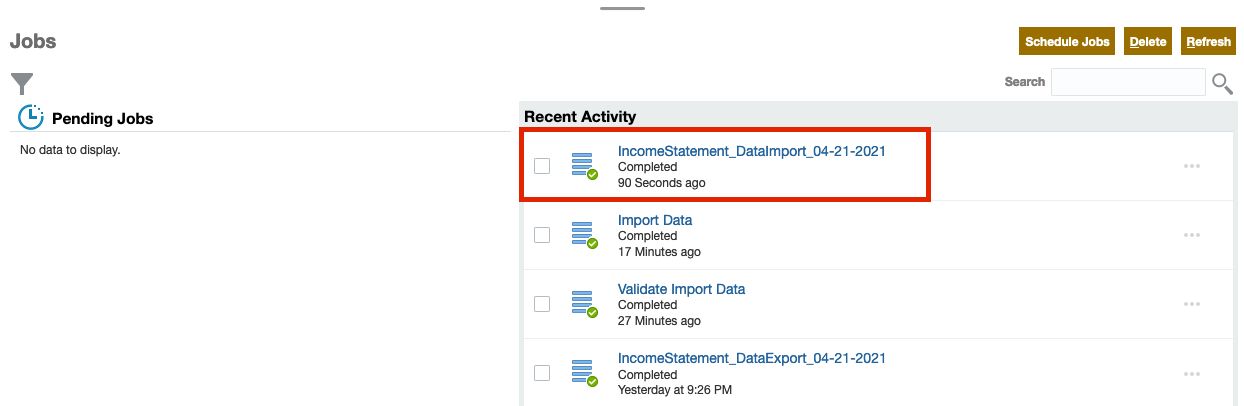
10. Go to Jobs and verify the import job completed successfully. Remember to verify that data loaded successfully by opening a data form and validate the data.
Source: Oracle EPM Tutorials.
Want to Learn More?
If you would like a free consultation please contact Gerard at Redhill Business Analytics via email or the contact form below.