

Forms can be used to display and input data for planning and budgeting. This blog post will provide the necessary steps to build a form.
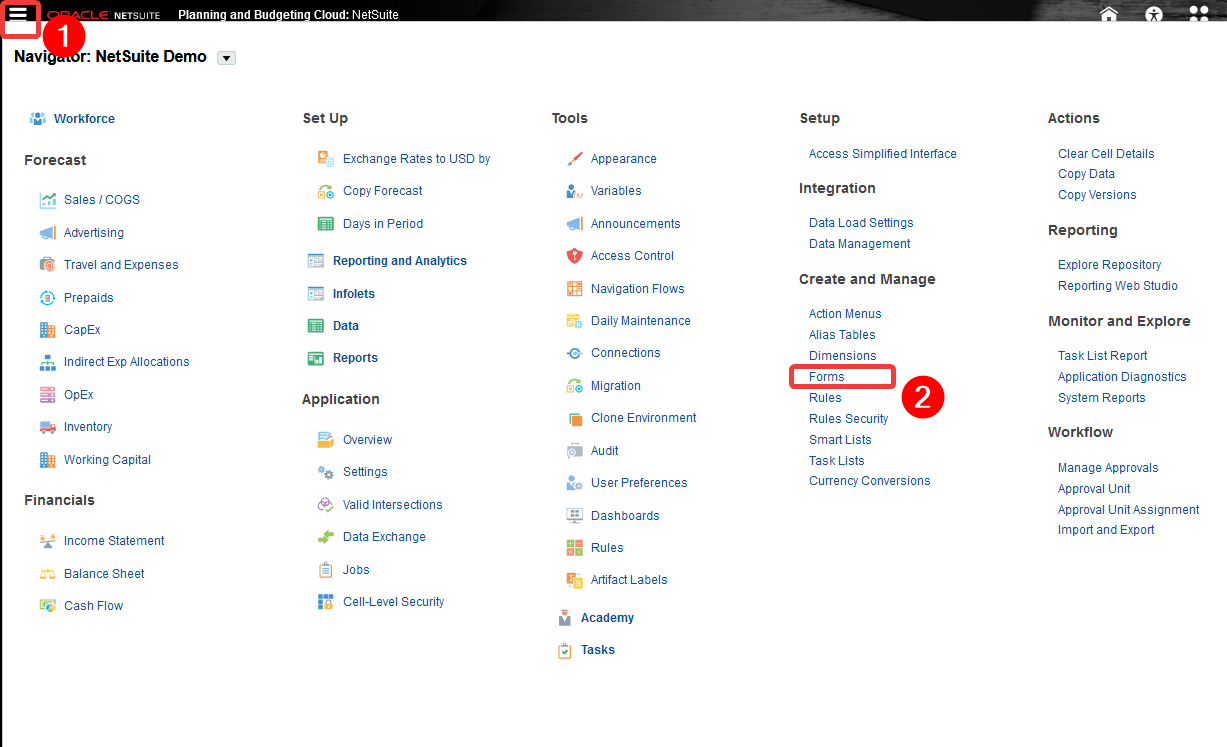
Click on the Navigator menu on the top left of the page. Under “Create and Manage” click on “Forms.”
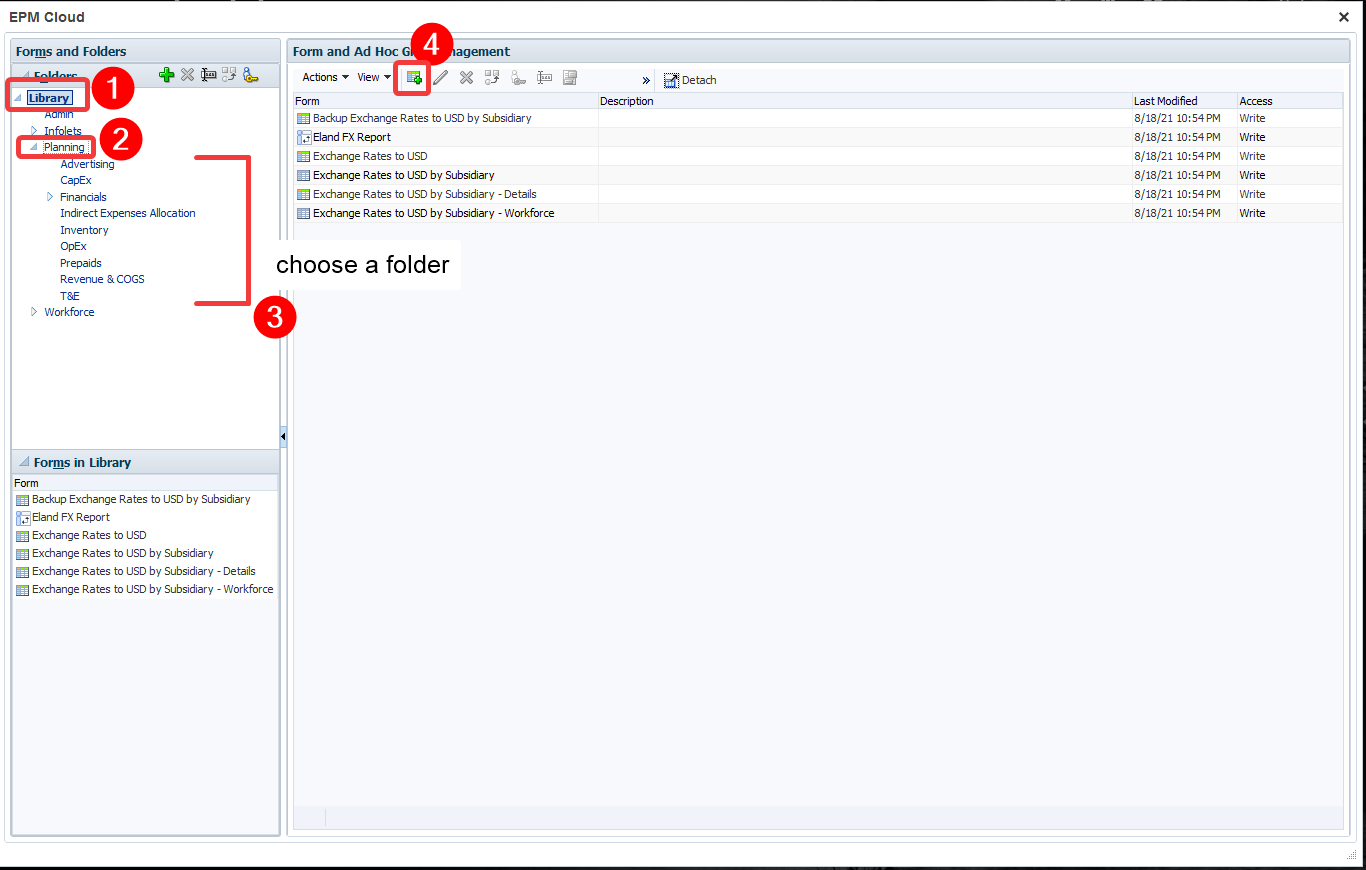
Choose the folder to create the form. All folders are located in the left panel under “Forms and Folders.” Expand the Planning Folder. Select the appropriate folder. Any existing forms in the folder will be displayed. To create a new form, select the “+” icon at the top of the page.
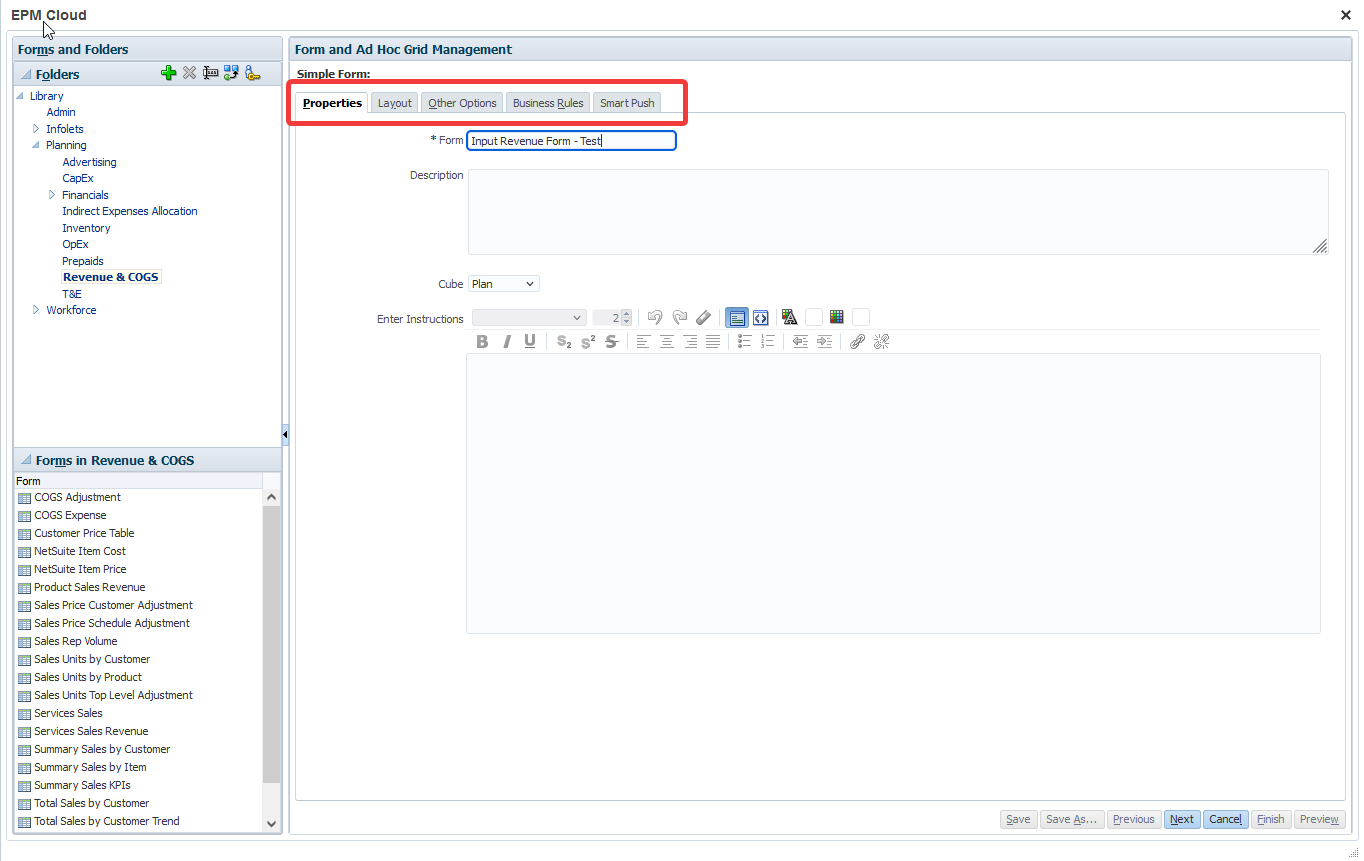
Enter the Form name and choose the appropriate cube. The Description and Instructions can be added after the form is created. Click "Next" or click on the “Layout” tab.
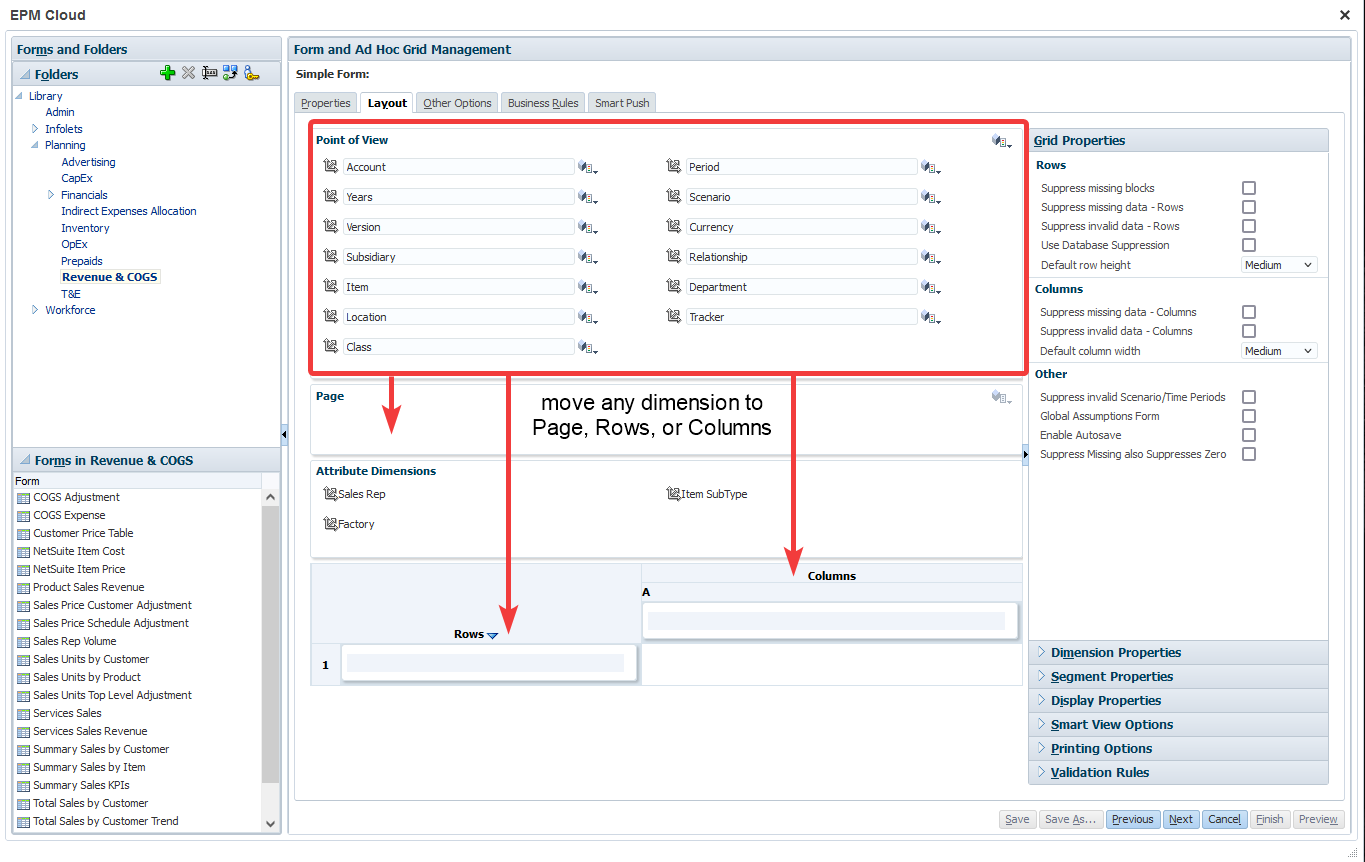
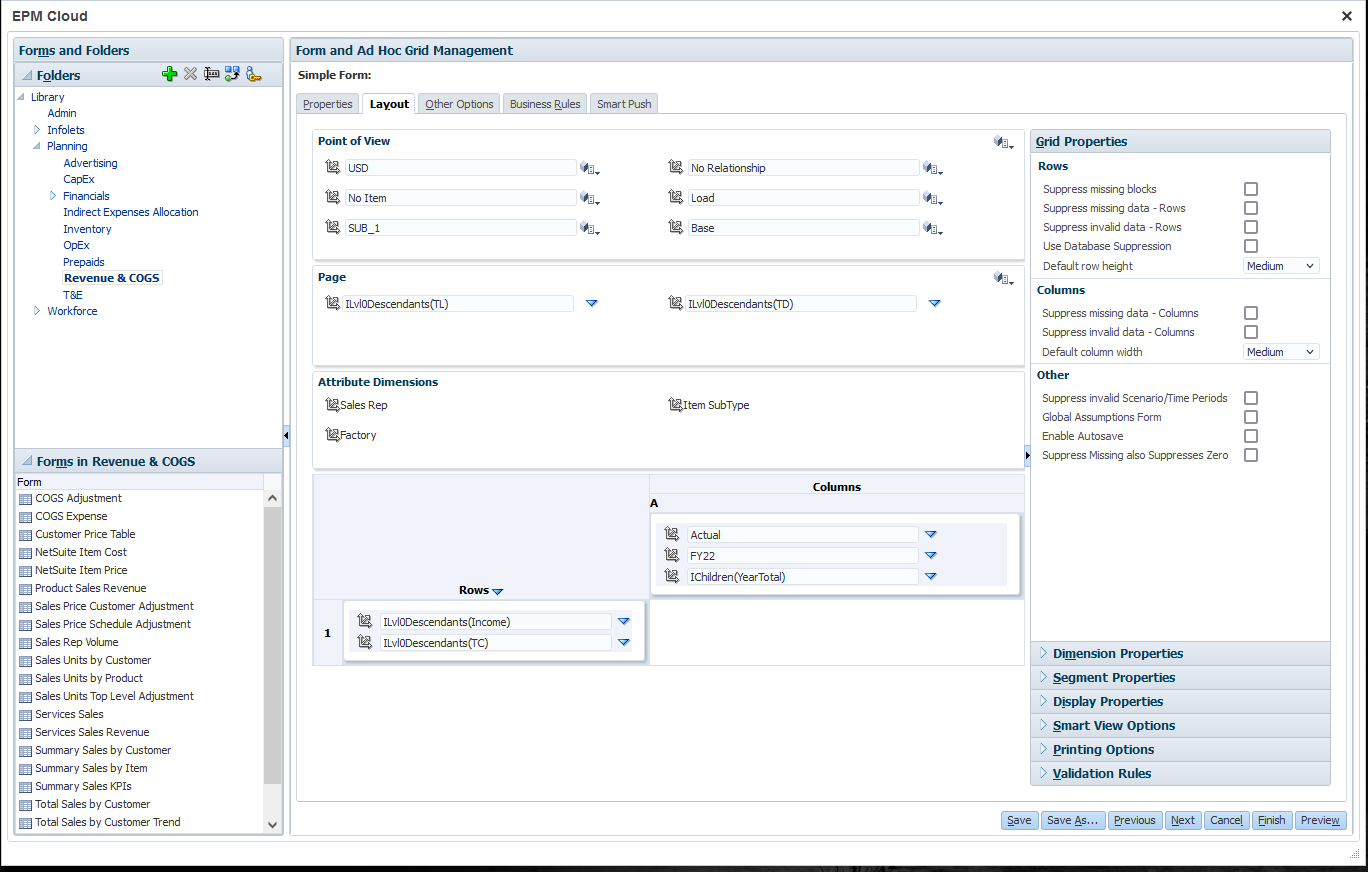
All dimensions are in the Point of View (POV). To move dimensions, click on the grey arrow next to the dimension and drag to the Page, Rows, or Columns. Each section is further described below.
The Point of View (POV): Dimensions in the POV are set and can not be edited in the form. Dimensions that are not used to view or input data should be kept in the POV.
Page: Dimensions in the Page will be selectable. Users can view or input data for different members of a dimension in the Page.
For example, if the user budgets by Department, the Department dimension will in the Page. The user can choose different Departments from a drop down list in the form.
Rows & Columns: Dimensions to be viewed line by line will be in the Rows and Columns. All members of the dimension will be displayed in the Rows and Columns.
For example, to budget expense accounts by month, move the Account dimension to the Rows and move the Period dimension to the Columns.
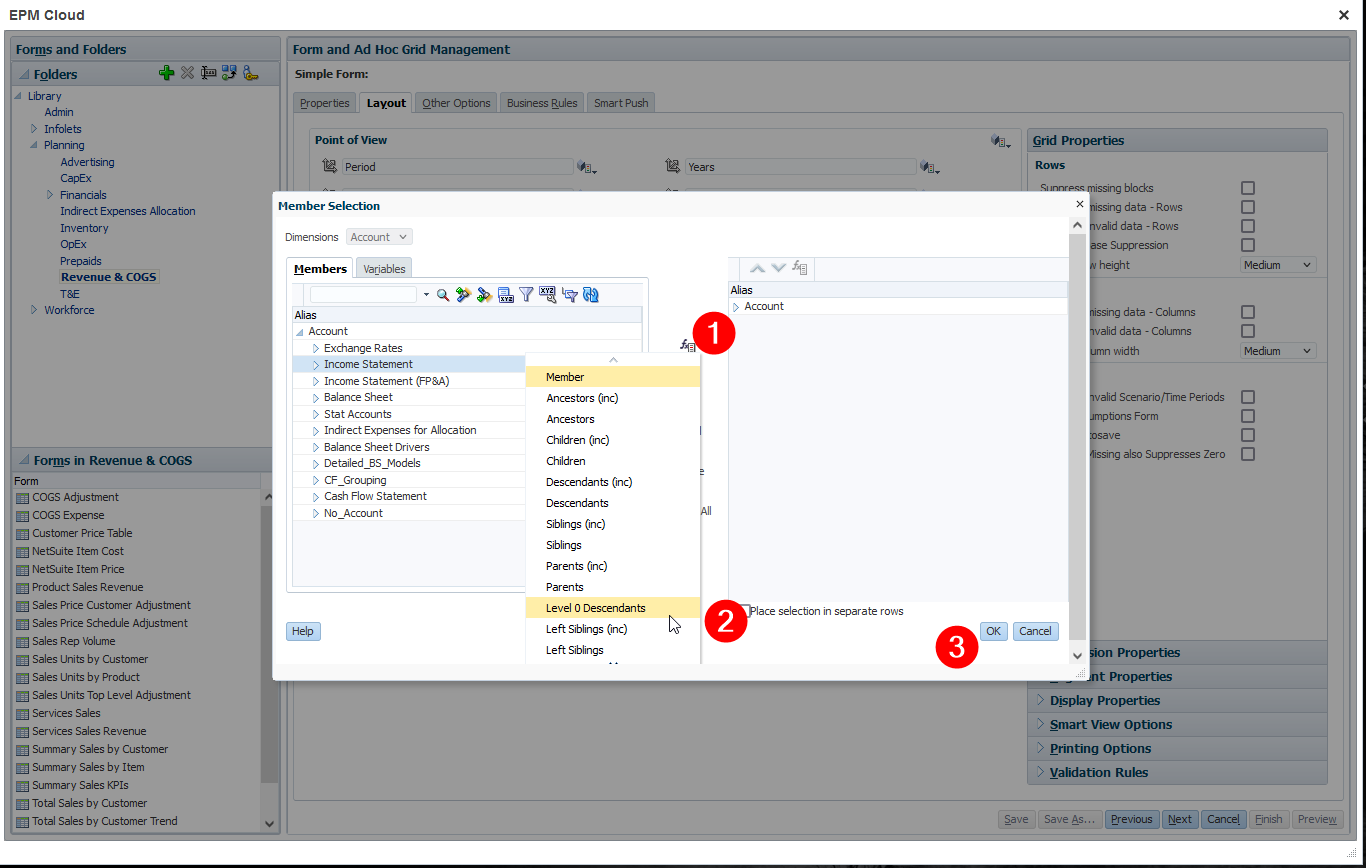
Move dimensions to the appropriate section. To select dimension members click on the blue arrow on the right of the dimension. Click on “Edit.” Find the desired member and click the blue “Add” arrow. Click on the Function Selector icon to include descendants or children of a member. Click OK.
To set up additional settings, use the properties in the right panel. The Grid Properties: Data suppression can be turned on to omit intersections without any data. Row and column width and height can be adjusted here.
Dimension Properties: Click on a Dimension. Here members can be selected to show Member Name or Alias. Dimensions that are not used in the form can be hidden to make the form cleaner.
Segment properties: Click a row or column to be suppressed or changed to read only.
Display Properties: To make an entire form "read only" use Display Properties. Any changes applied here will be applied to the entire form.
On the Other Options Tab, currency and percentage values can be adjusted. For the business rules tab, any existing business rules can be attached to the form to drive calculations.
After making all of the necessary changes, Click Save on the bottom right of the page. Click Finish to complete the form.
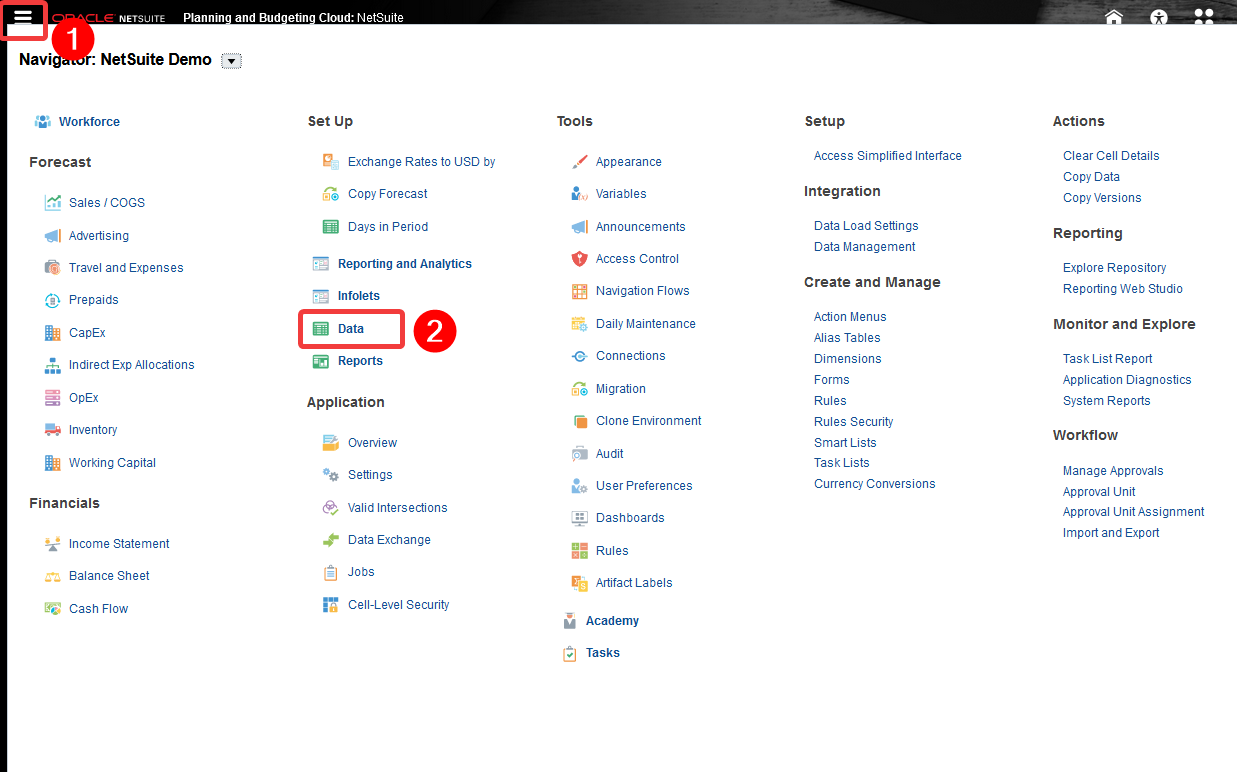
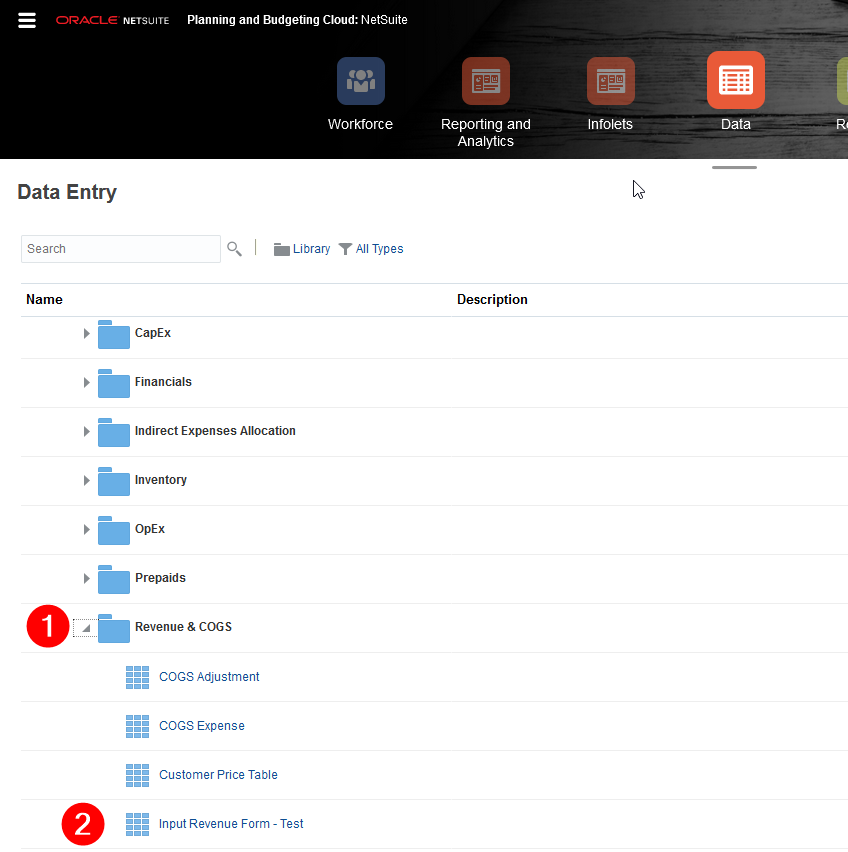
To view the form, go to the “Navigator.” Under “Set Up” click on “Data.” Expand the appropriate folder and click on the new form.
The standard form looks similar to the image below. Blue Dimensions in the POV can be chosen for each member. These were the dimensions in the Page. Black dimensions in the POV cannot be changed. Dimensions in the rows and columns display all members.
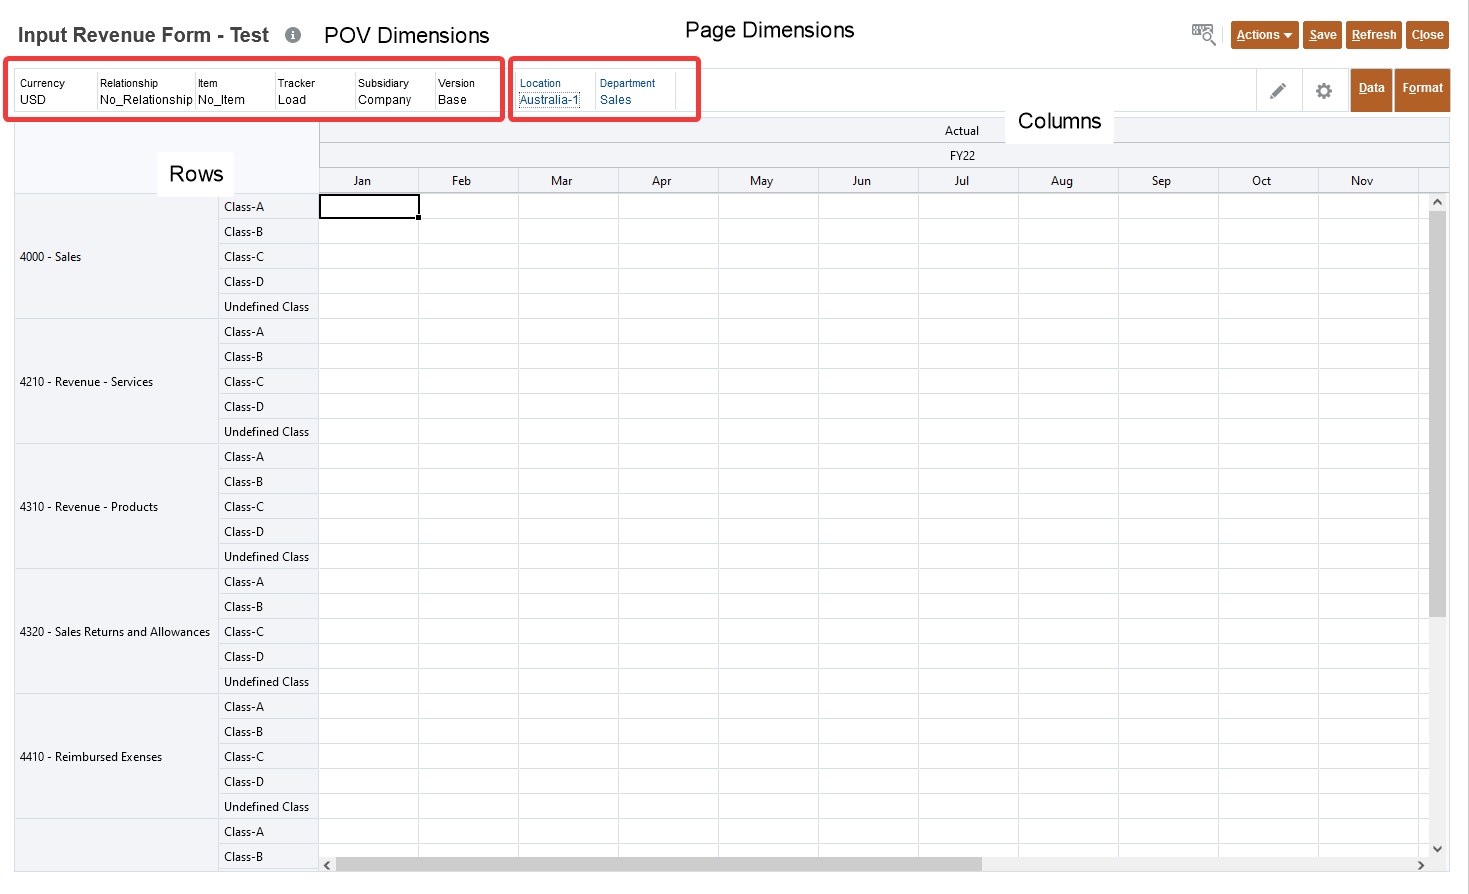
Location and Department can be selectable for this form. Click on the member to change it and click ok.

Forms are very useful tools to display and input data or planning and budgeting.
Want to Learn More?
If you would like a free consultation please contact Gerard at Redhill Business Analytics via email or the contact form below.